Welcome To Theme, Behave
Installation - Video Tutorial
-
To get quick and easy Theme Installation, We recommended you to read Shopify Introduction to have a clear idea about all the aspects of theme customization.
Important Notes ↑ Back to Top
Please, read the entire section, before attempting to install the theme.
It is recommended to always take a full backup of your store before making any upgrades or changes!
Theme Installation Steps↑ Back to Top
To Get - FREE THEME INSTALLATION SERVICE
To install theme/settings without any trouble?Yes, we're offering FREE THEME INSTALLATION SERVICE for one time, after completely installed theme, your store looks perfect as same as our live theme demo, or for any queries please Contact Us
Useful Manuals
Prepare For Installation
Step 01: With the theme package, you can get Three folders (like Demo-images, Documentation, Themes) with all of the layouts & particular demo-images.
Step 02: Please select any one layout that perfectly suitable for your store requirements and upload it (like theme-01, theme-02, etc...)
Upload Theme↑ Back to Top
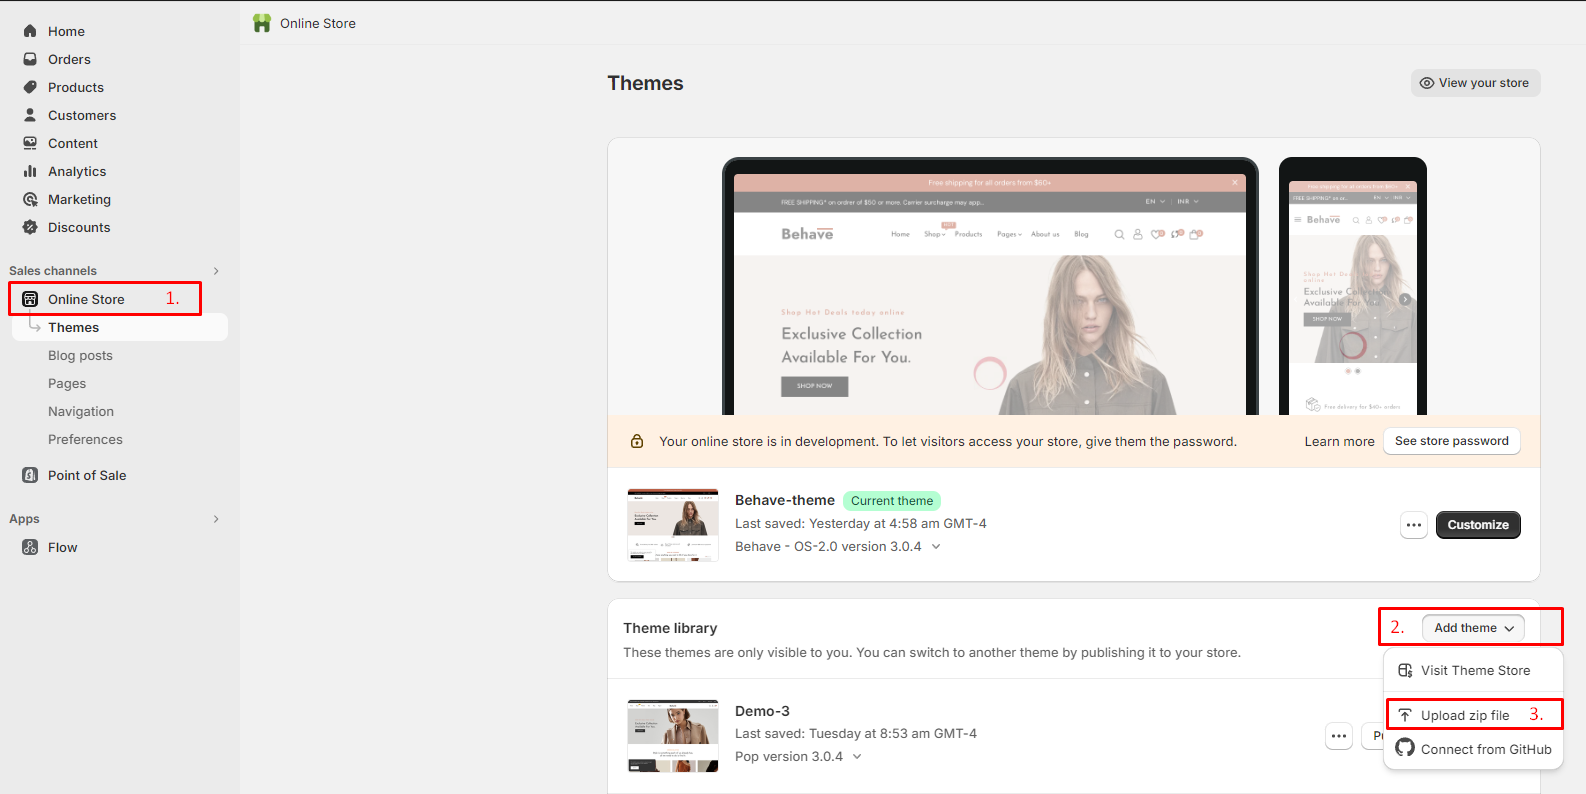
To upload that particular chosen theme layout-file, Please follow the below steps:Step 01: Go to Online Store -> Themes and Click to Upload Theme
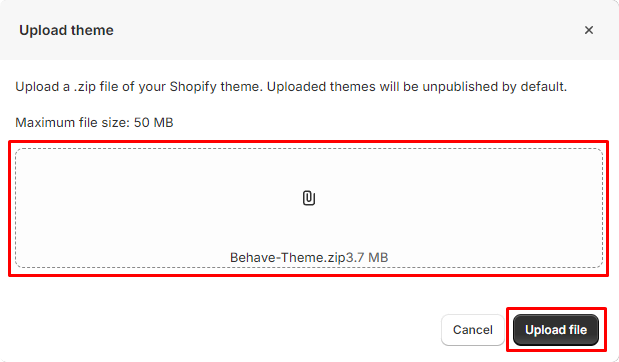
Step 02: And Browse chosen theme-layout package to upload it (like theme-01.zip)
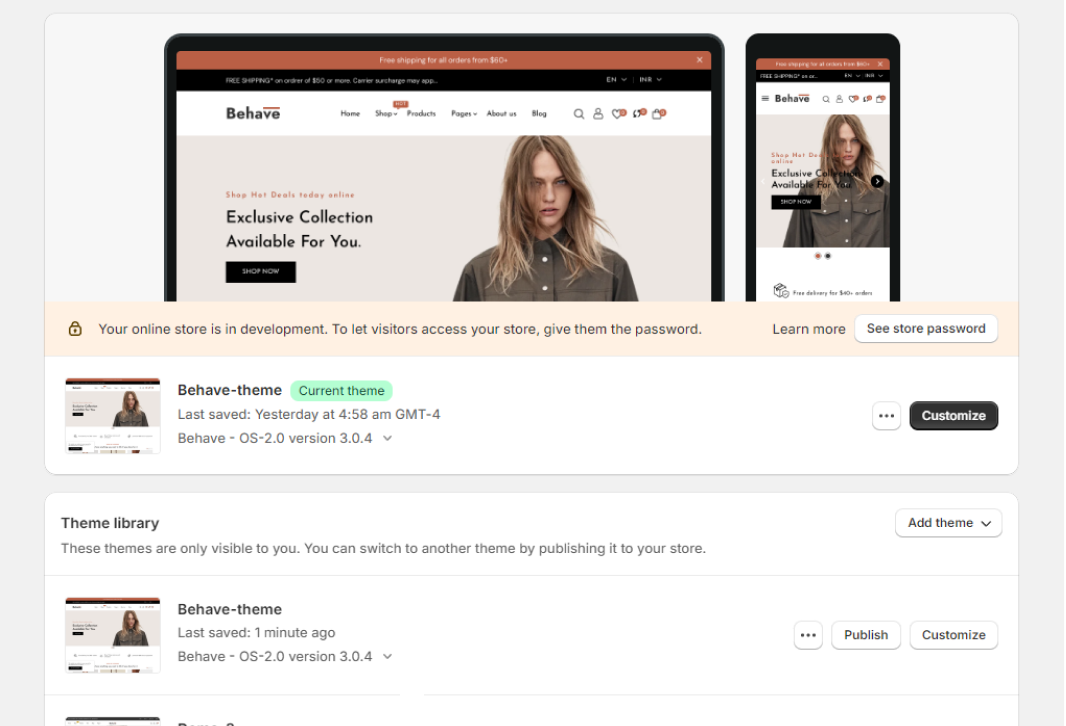
Step 03: With the theme package, there are several layouts to chose anyone from them to install.
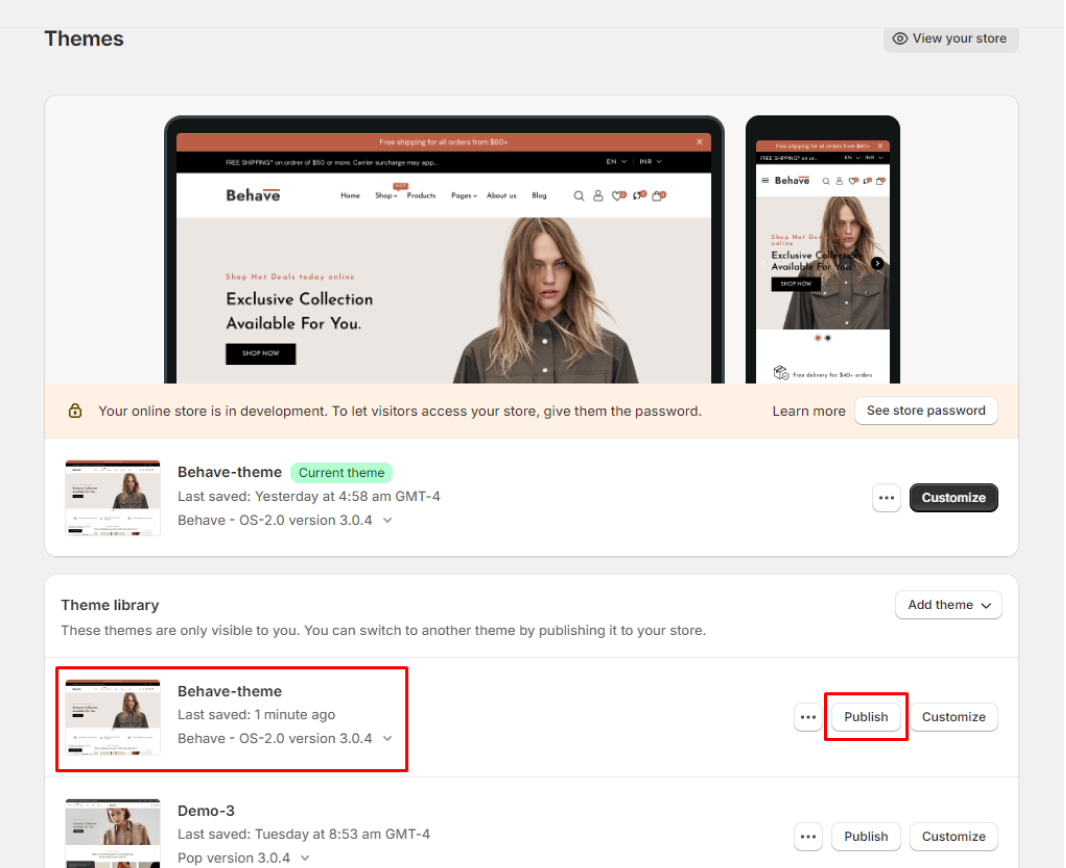
Step 04: Click to Publish.
Store Configuration↑ Back to Top
Please follow the below-required settings to configure your store like a theme demo
Enable Customer Accounts↑ Back to Page
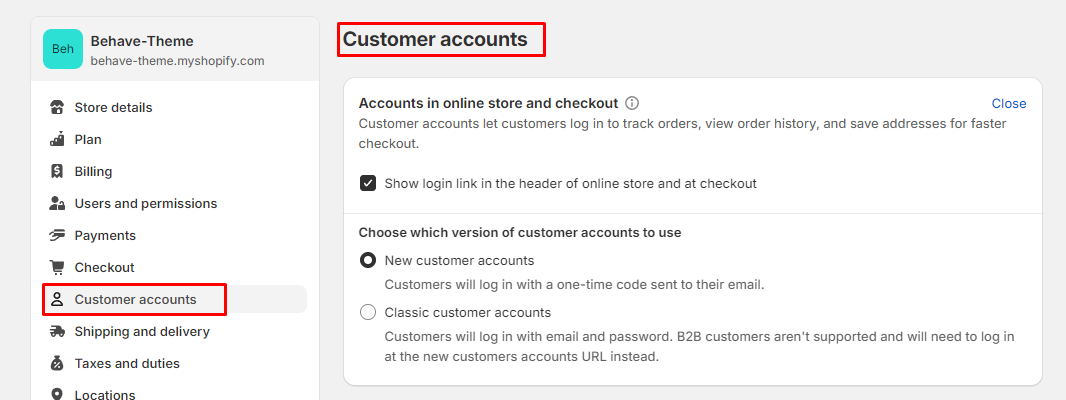
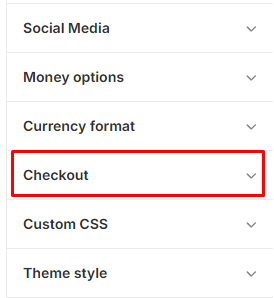
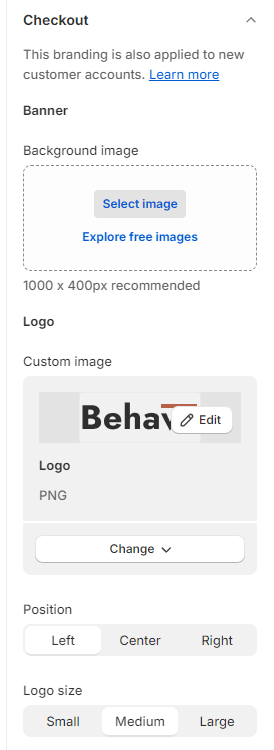
Go to Store Admin -> Settings -> CheckoutFind Customer accounts, Select Accounts are optional and click Save
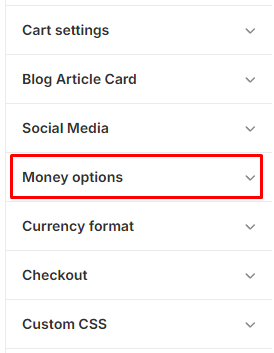
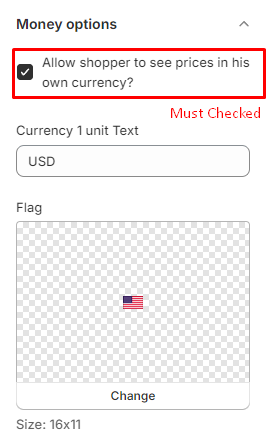
Currency Settings↑ Back to Page
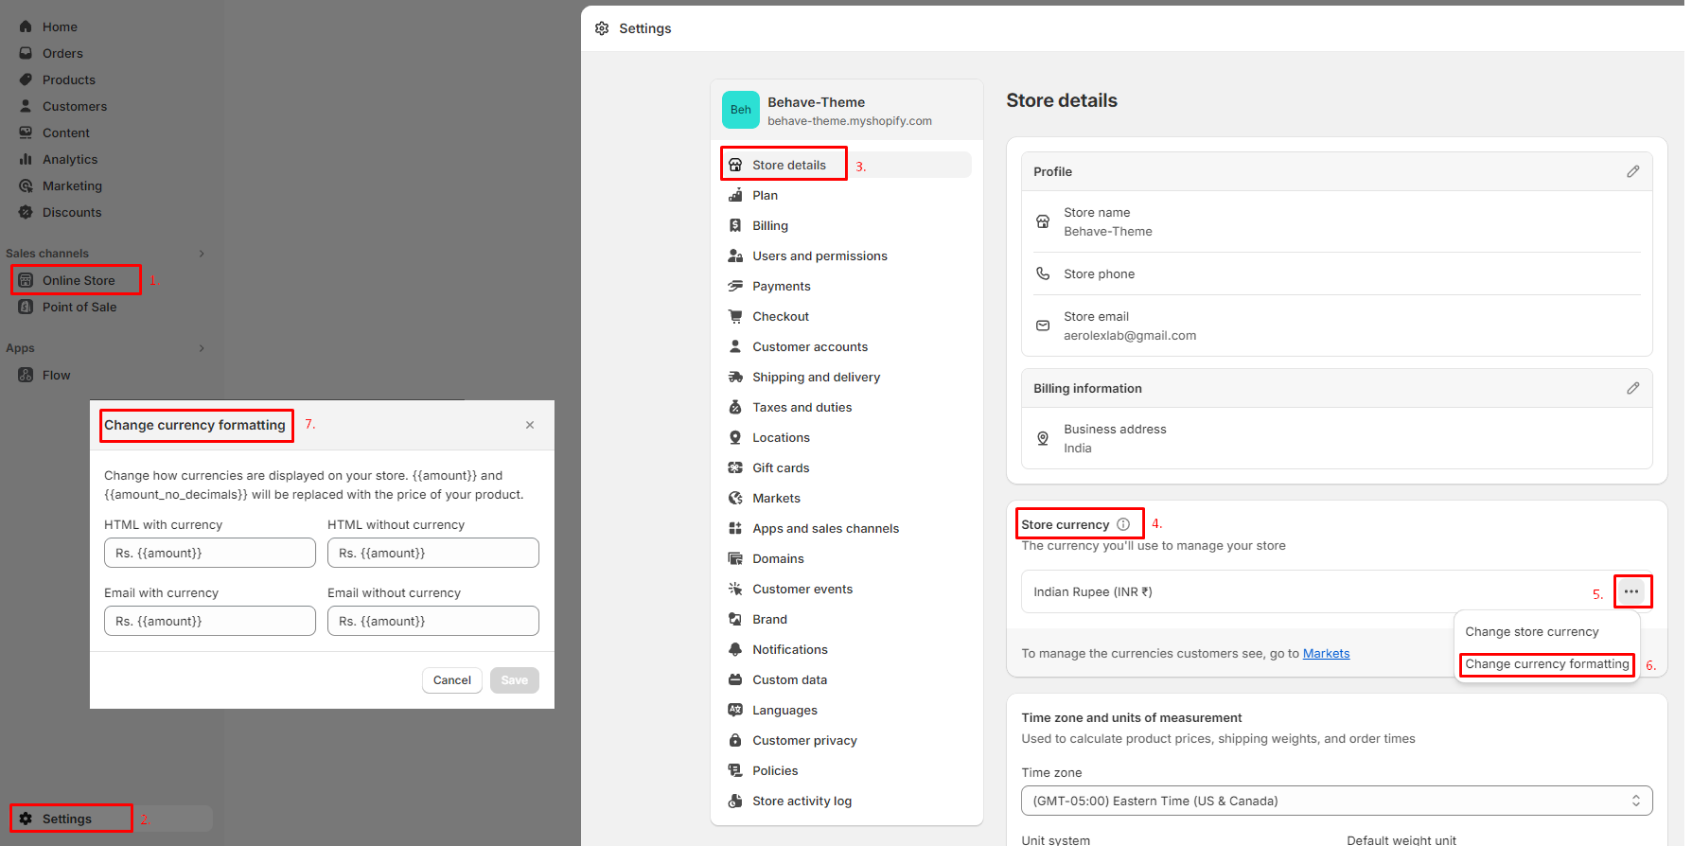
Go to Store Admin -> Settings -> General-
Then Scroll down to Store currency block and click on the Change formatting link.
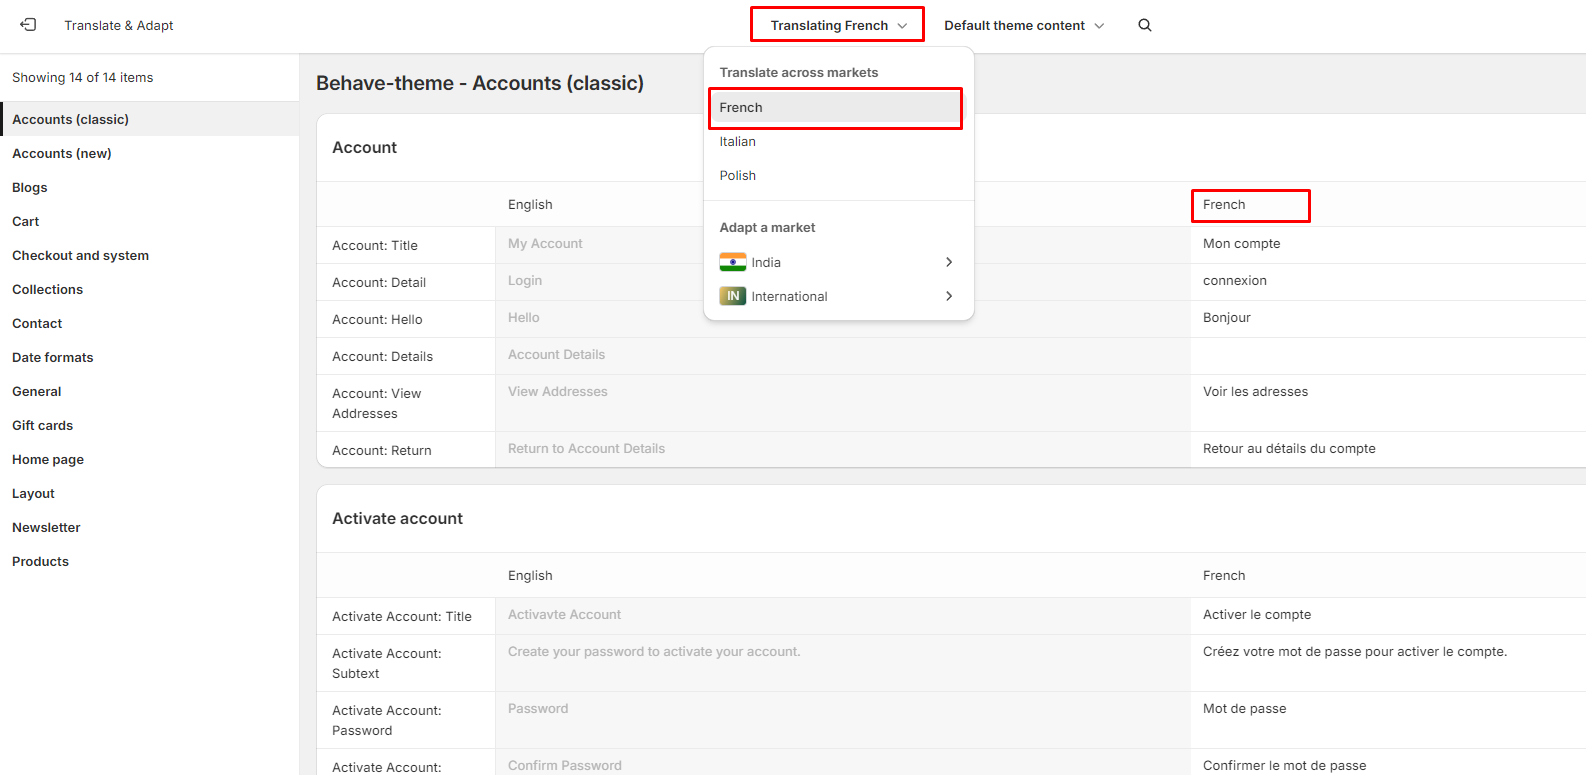
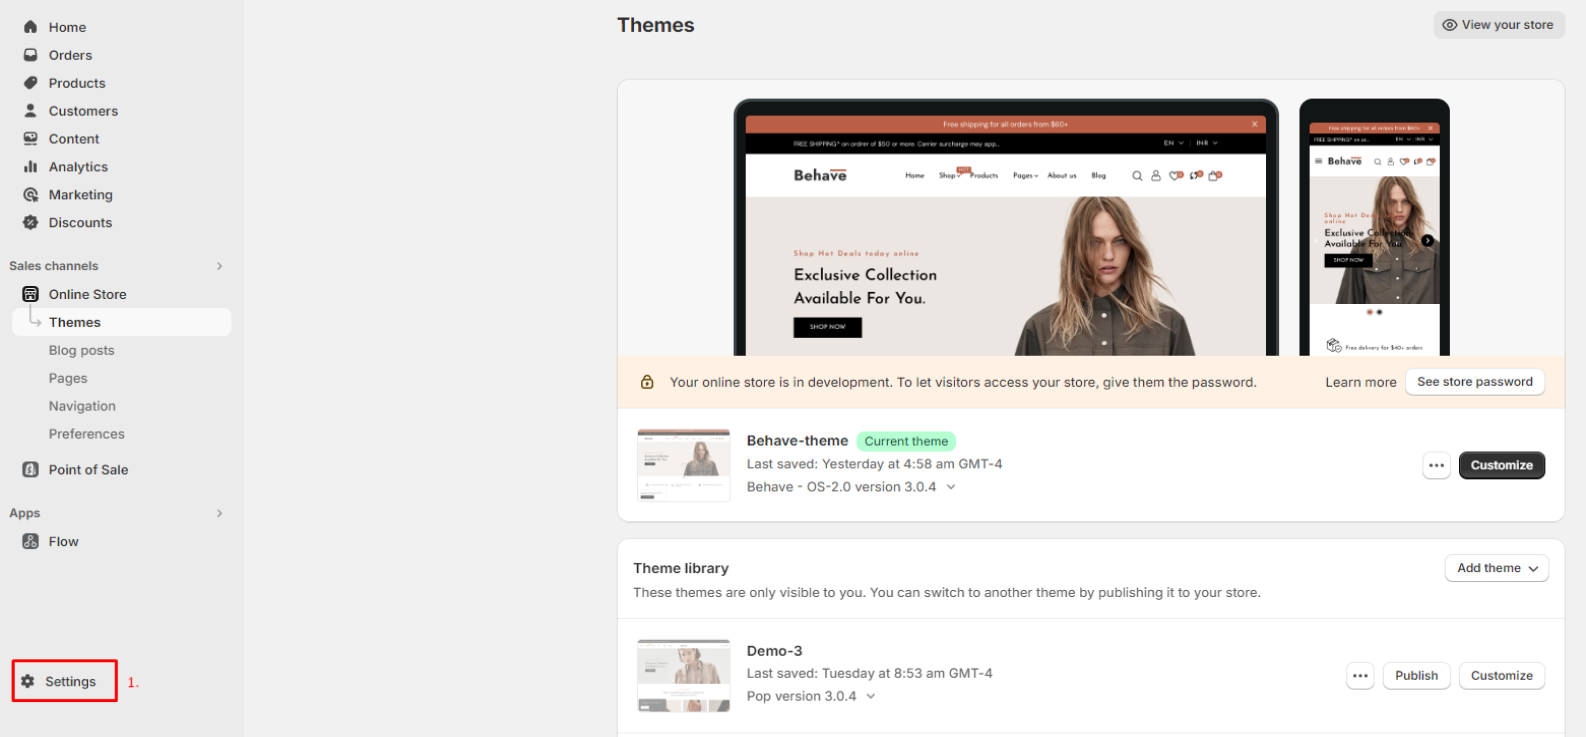
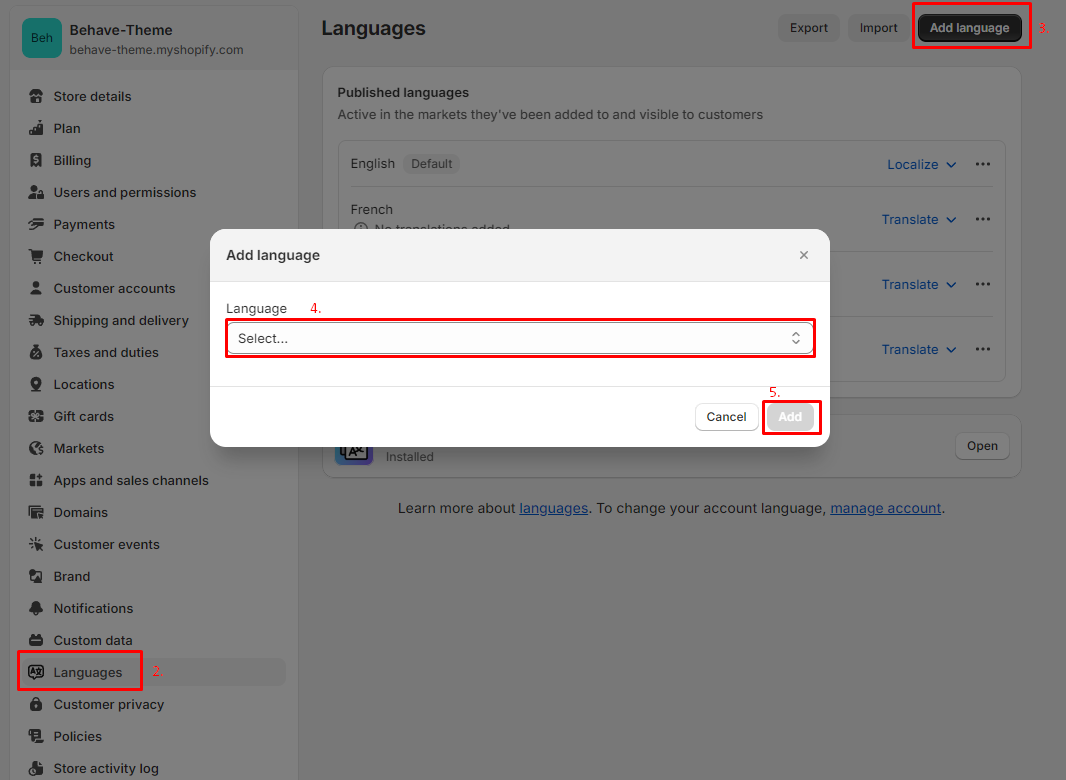
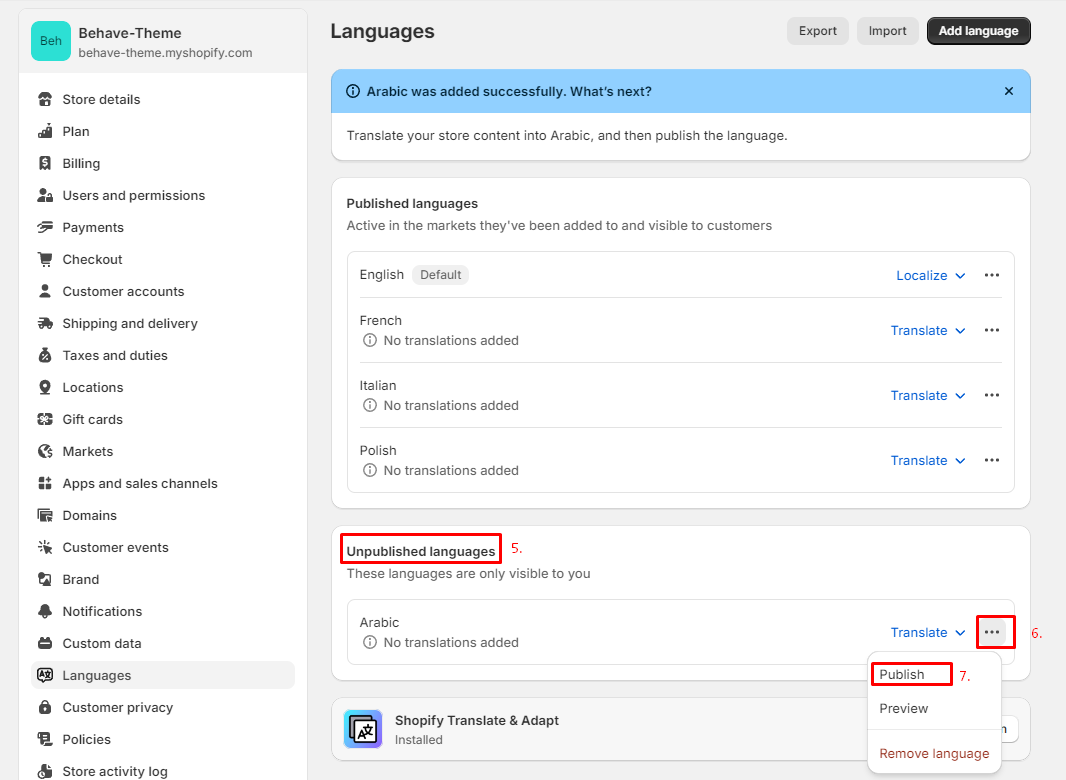
Language Translation Settings↑ Back to Top
To change RTL layout CSS-style, you just need to regenerate the RTL file to get changes.
- First, you have to add it to the default store language.
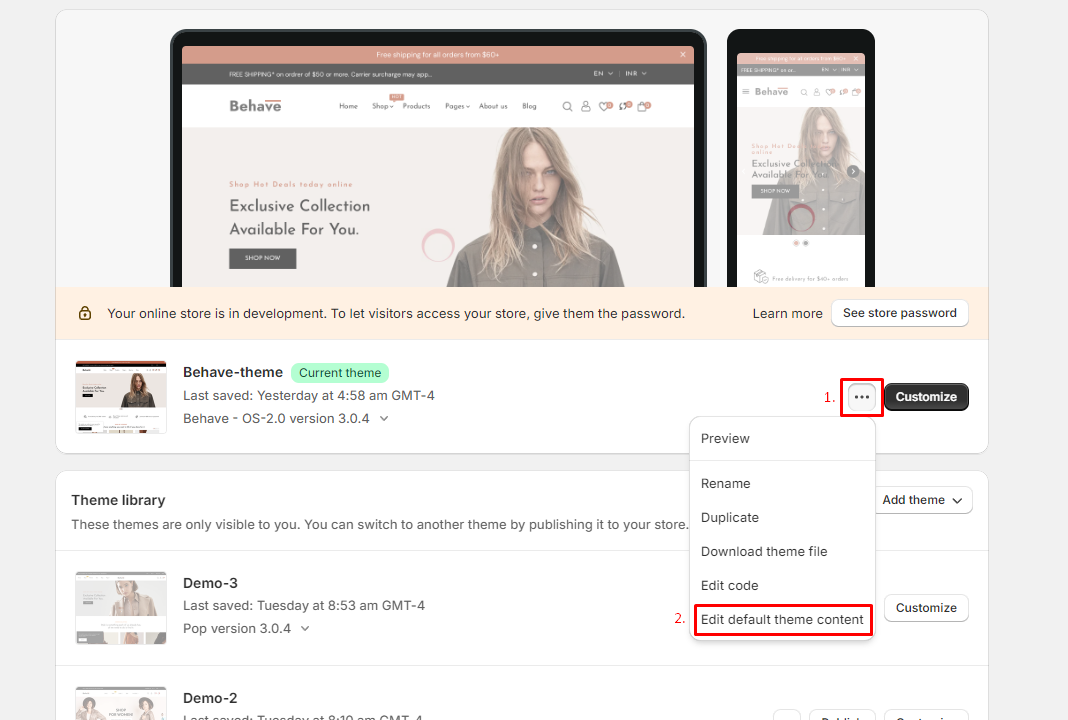
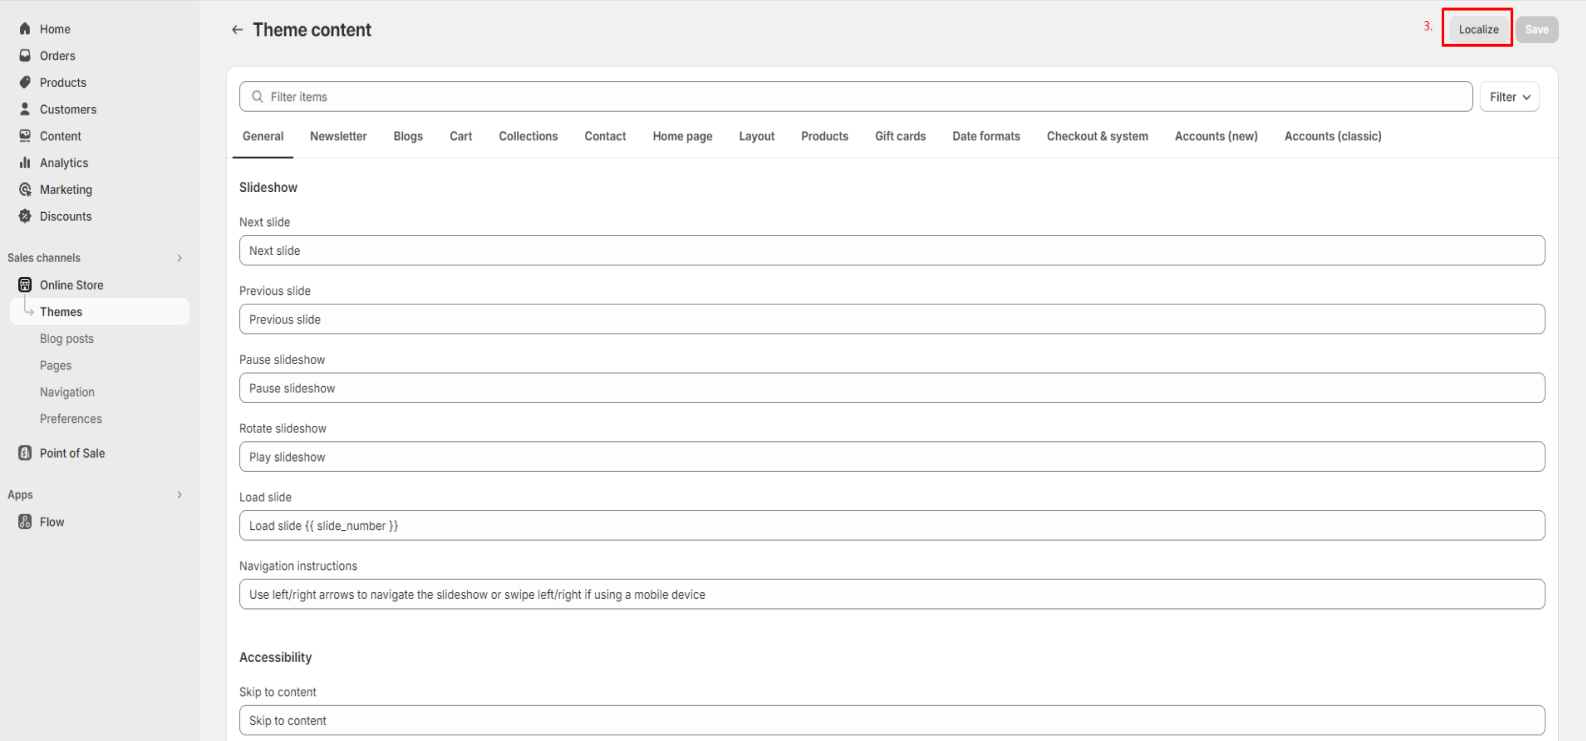
- To generate Translation:
To choose your Default Translation Language
- You also can able to add multiple languages from store language settings.
- To generate Translation:
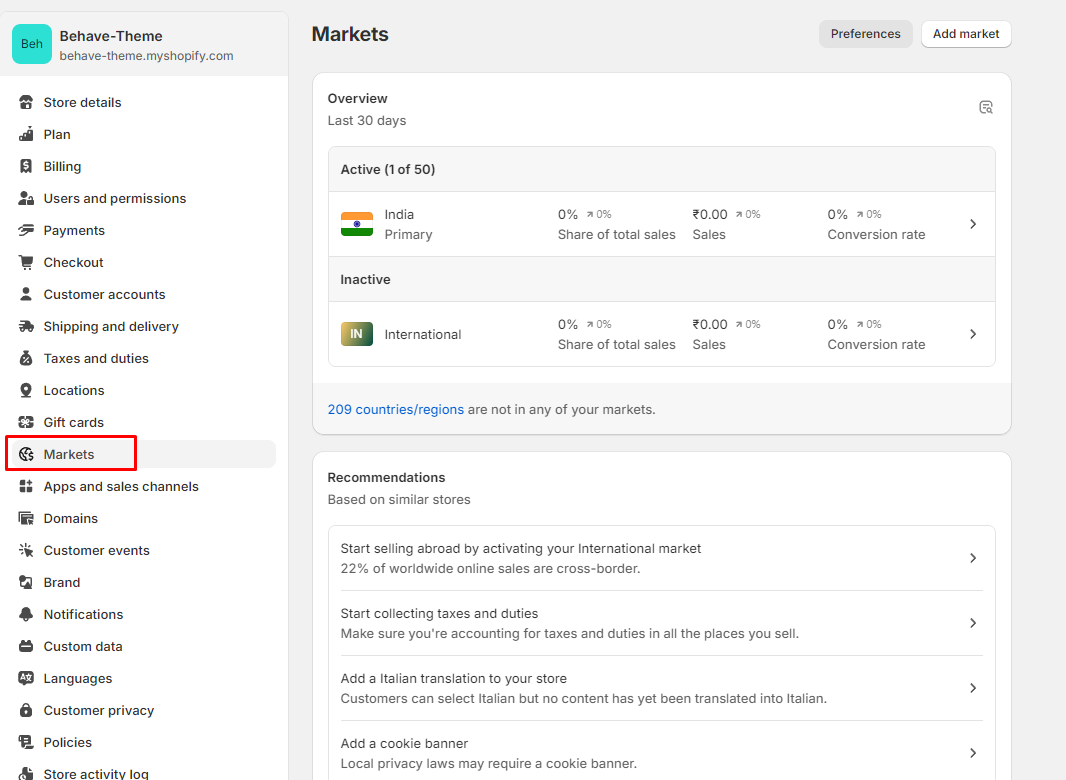
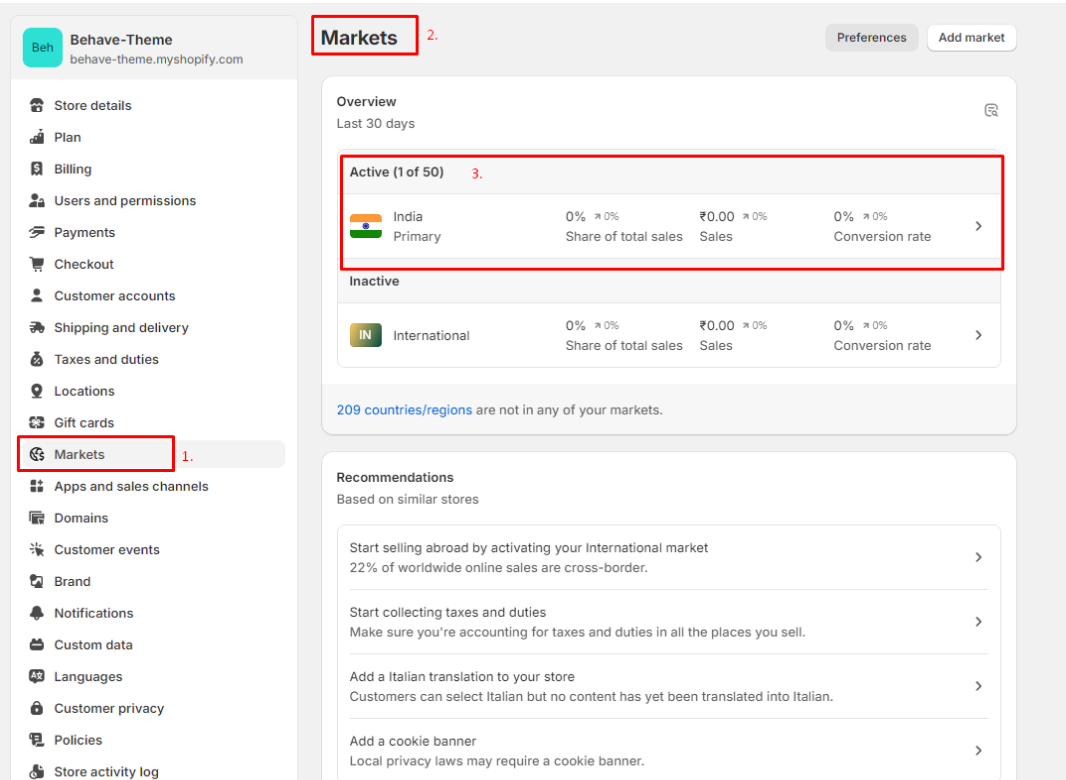
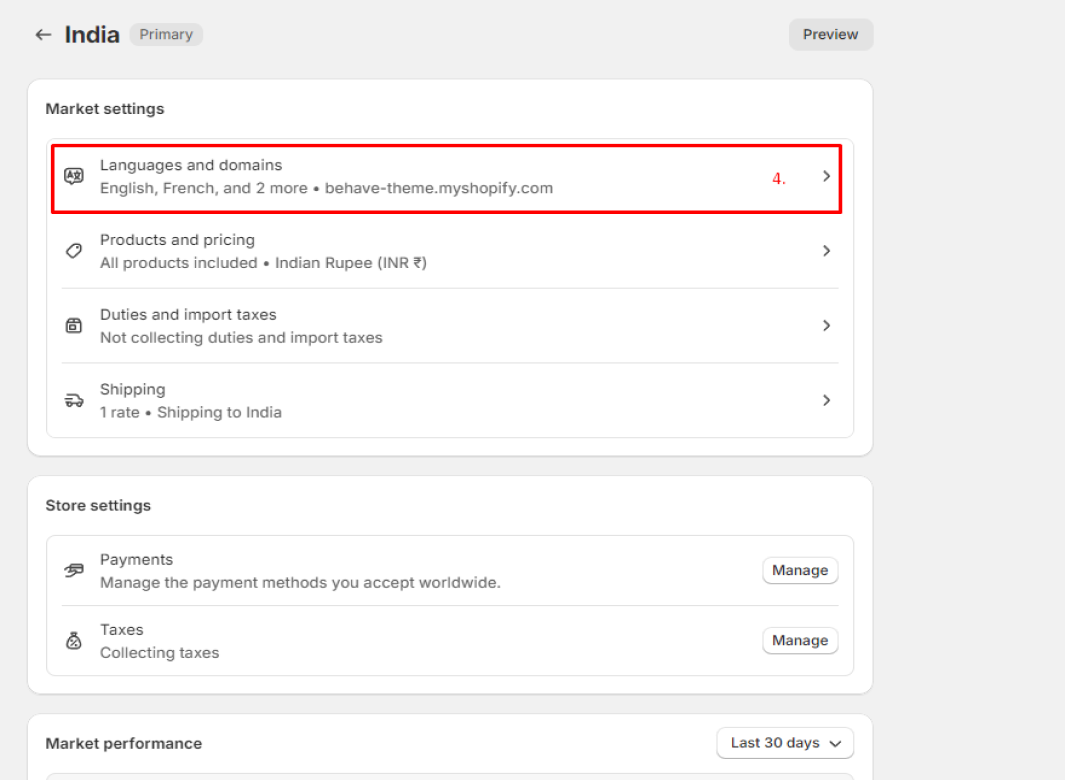
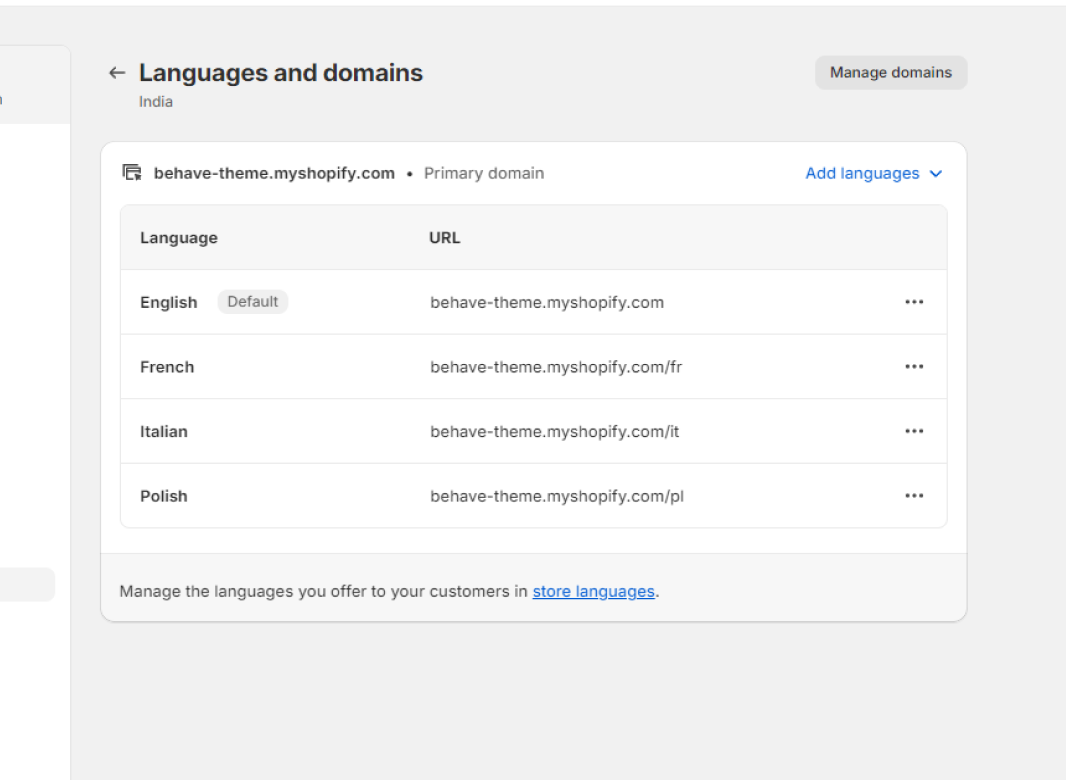
Step 01: Go to Store Admin -> Settings -> Store languages
Step 05: Click on the Manage. Step 06: Click on the Manage . Step 07: Select all the language.
Note: If you already set the default store language and try to change it from store language settings, your default store language will be removed.
Navigation Menu↑ Back to Top
Refer to some articles to get a clear idea about how to setup menu-navigation.
How to create a new menu↑ Back to Page
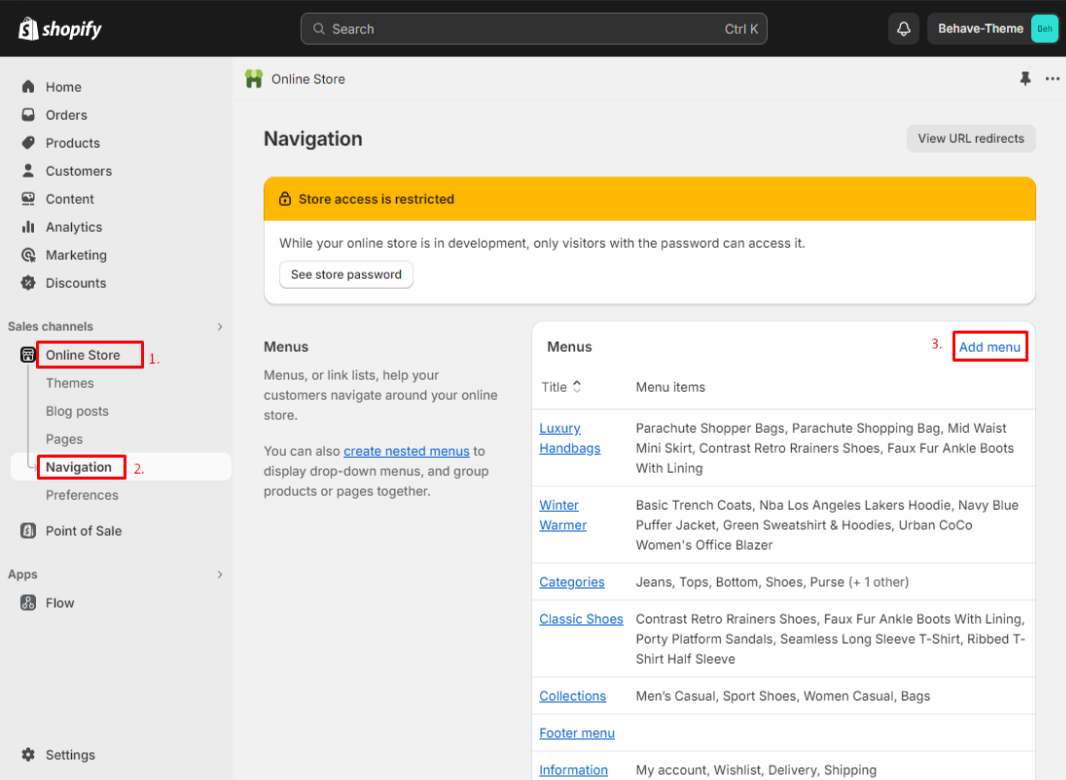
You can create a link, list of collections, products, pages, or blogs with the menu.Go to Online Store -> Navigation -> Add Menu button
AL Megamenu Settings↑ Back to Page
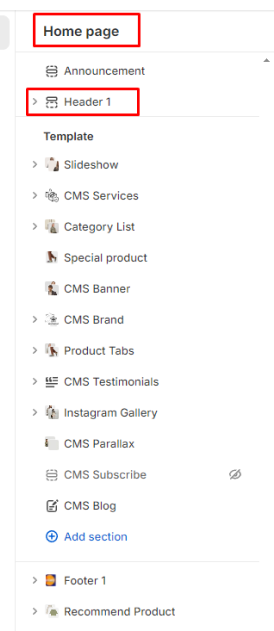
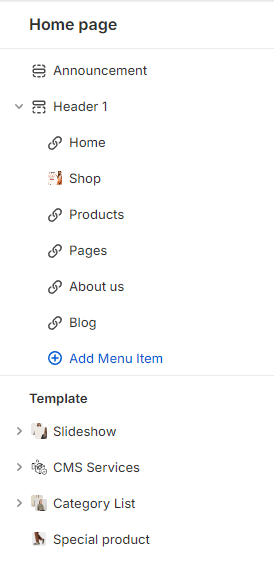
To add the heading.
Add Home Menu Presets↑ Back to Menu
-
To add Submenu All layout Links. like title, image, and link.
Add Shop Menu↑ Back to Menu
-
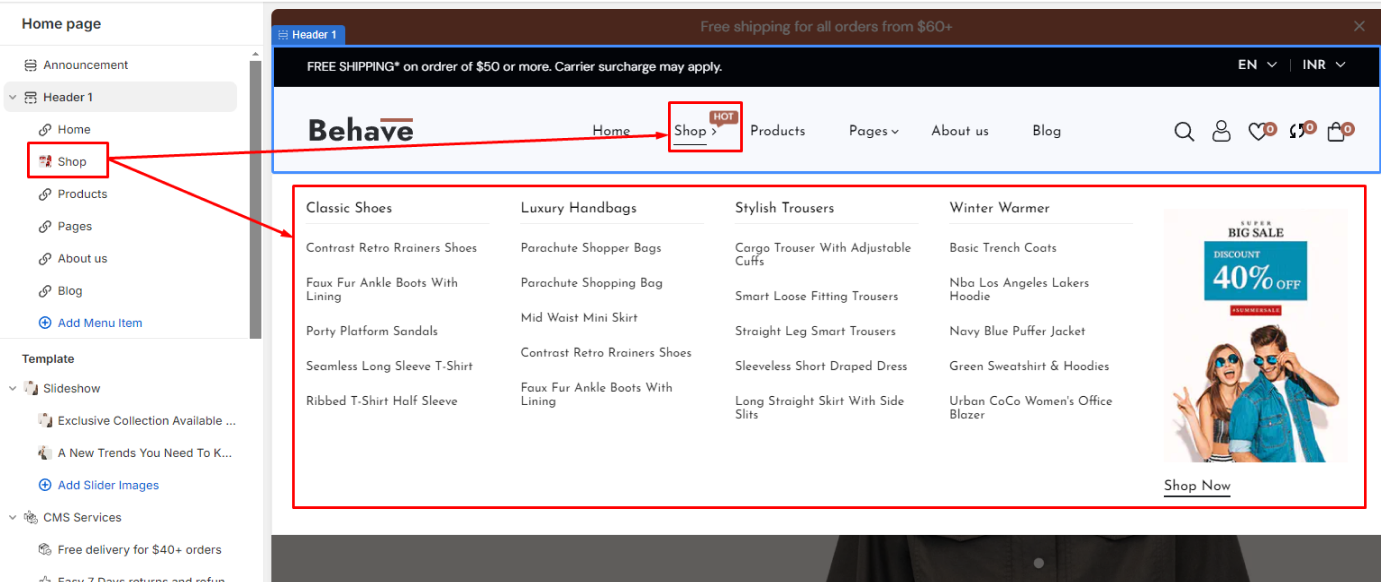
To add Submenu category page links, product page links, hover effect links, extended product links & banner.In this add title, select menu, and also set menu width in customizer.
Add page Menu↑ Back to Menu
-
To add Submenu pages links. select menu, and also set menu width in customizer.
To add blog Menu↑ Back to Menu
-
To add the Submenu blog link, select menu, and also set menu width in customizer.
To add look book Menu↑ Back to Menu
-
To add the Submenu product link, select menu, and also set menu width in customizer.
Set Store Pages↑ Back to Top
You can create unlimited pages like as About us, Contact us, Faq's, Wishlist.
How to Create Pages↑ Back to Page
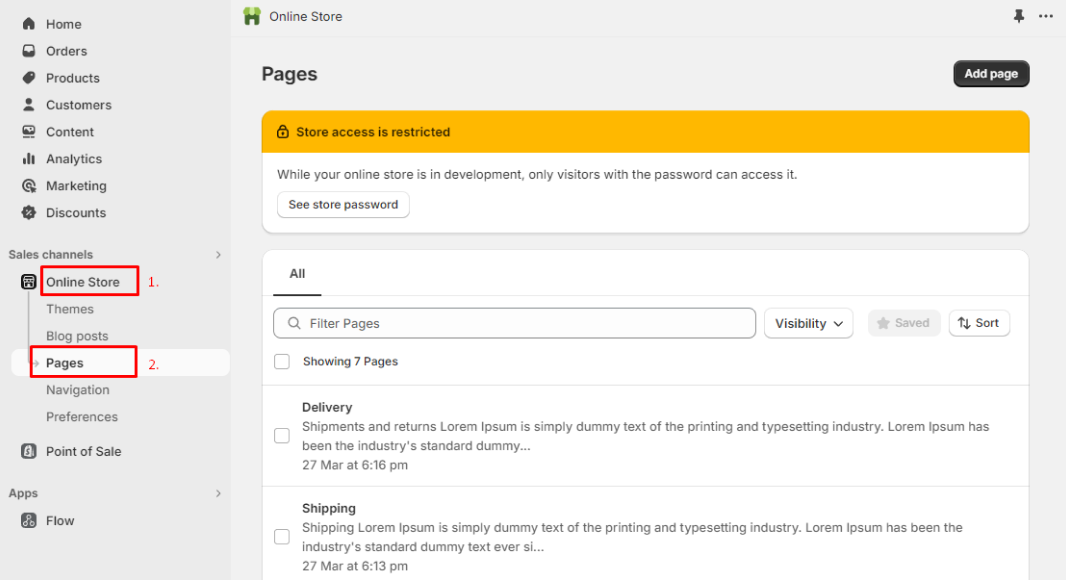
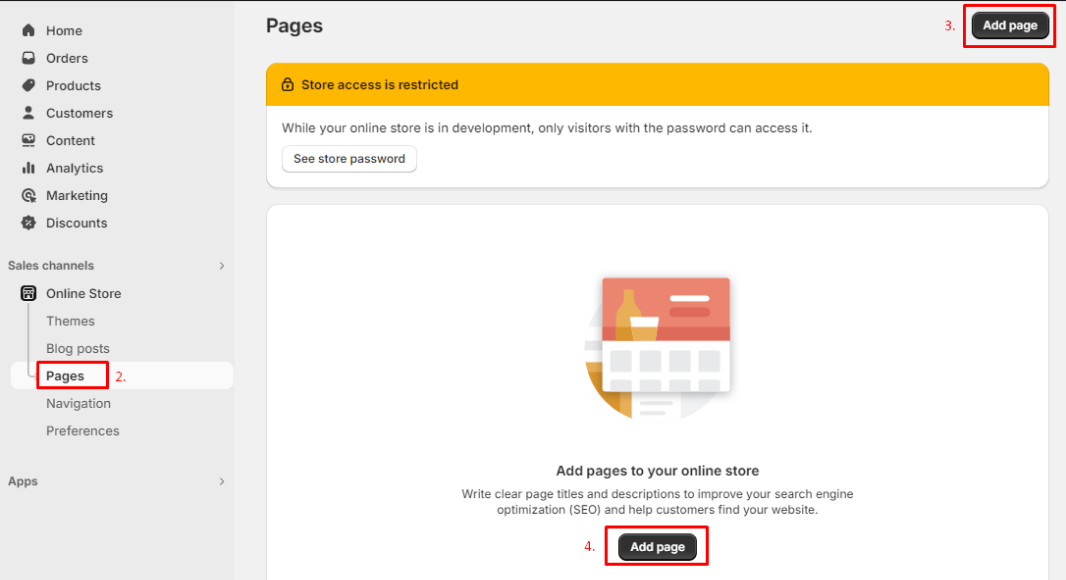
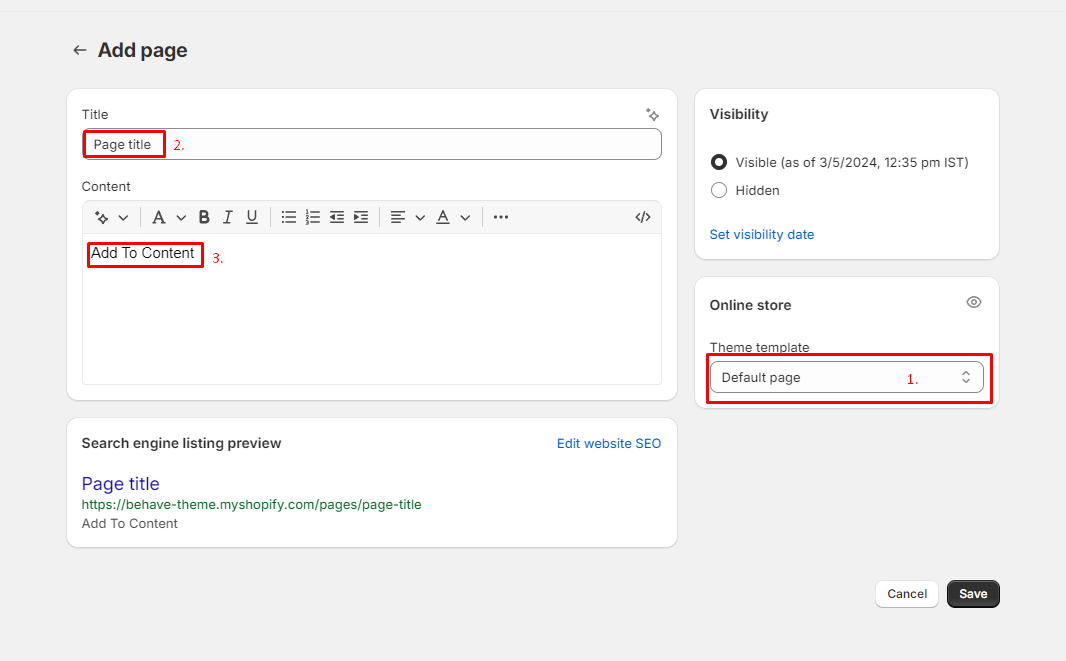
Step 01: Go to Online Store -> PagesStep 02: Click on the Add page
Templates for other pages,
- Contact Us - contact
- About Us - aboutus
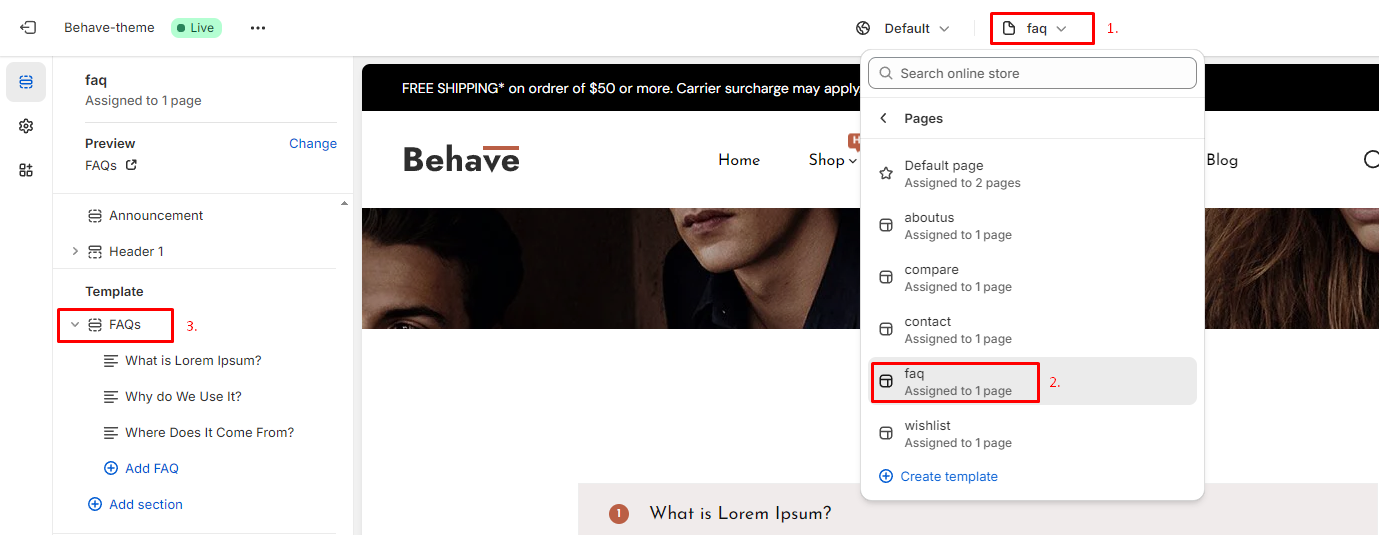
- FAQ's - faq
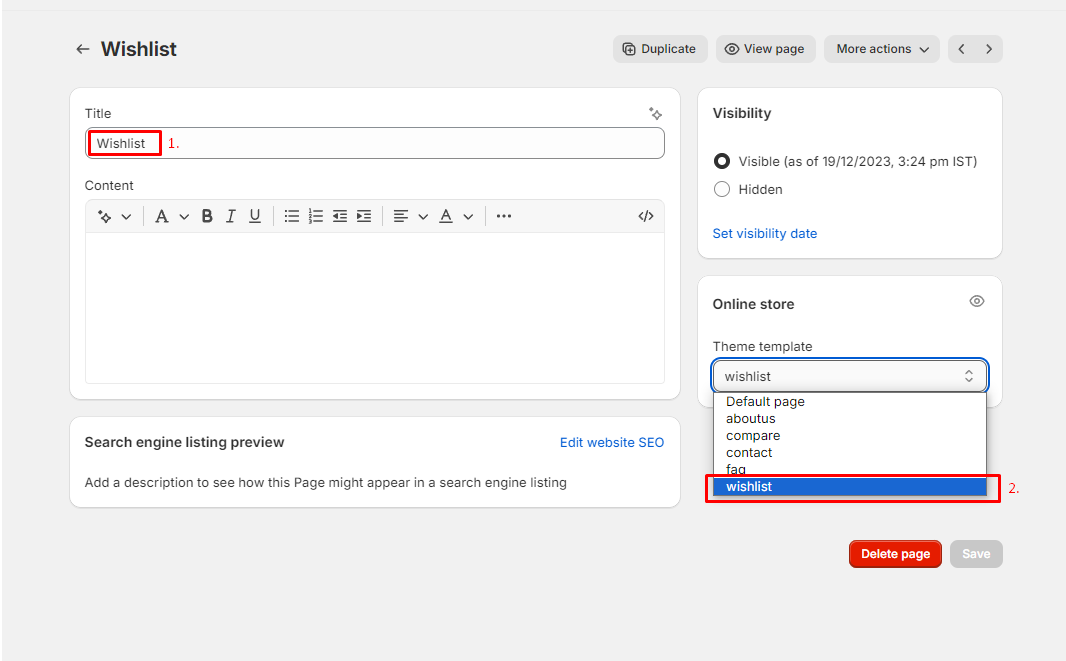
- Wishlist - wishlist
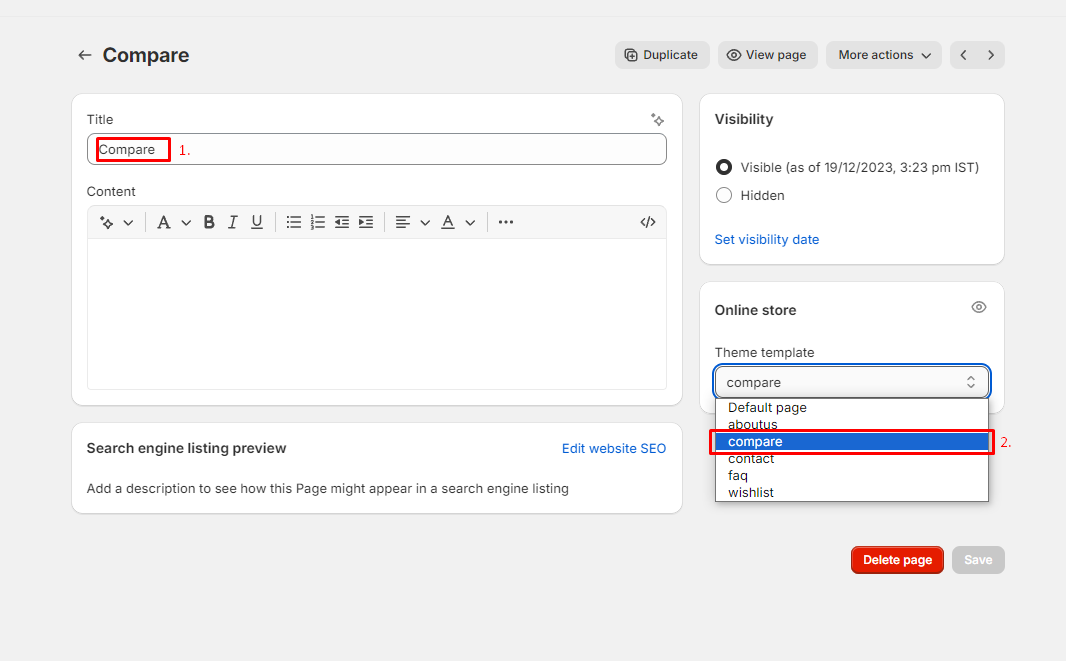
- Compare - compare
- And for other Pages - Default page
Create a Contact us page↑ Back to Page
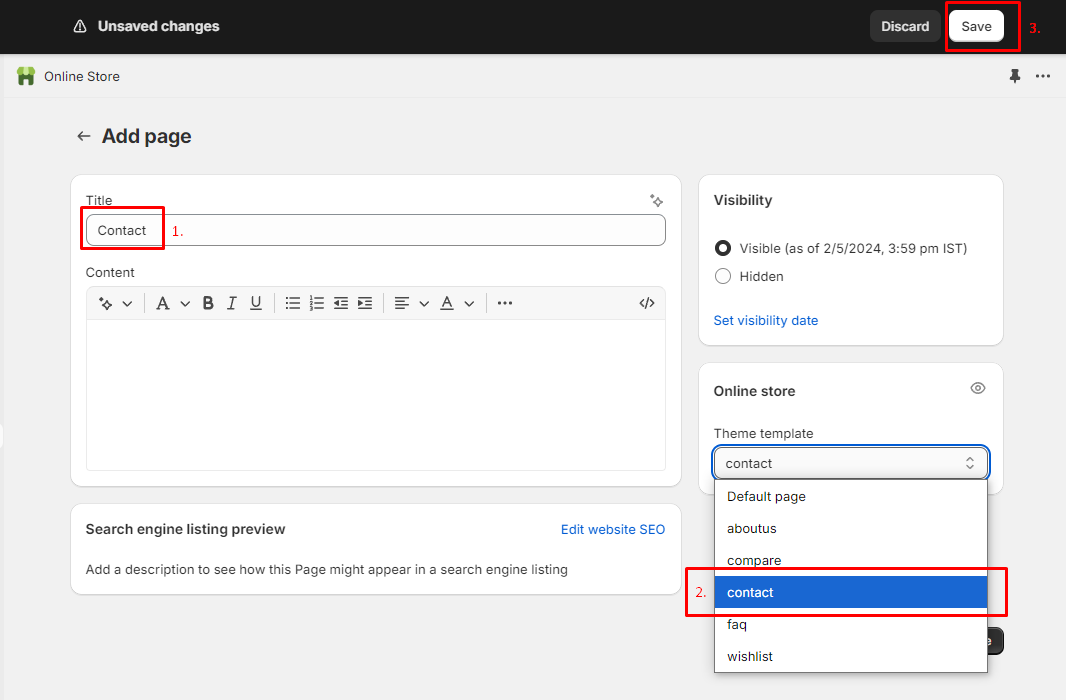
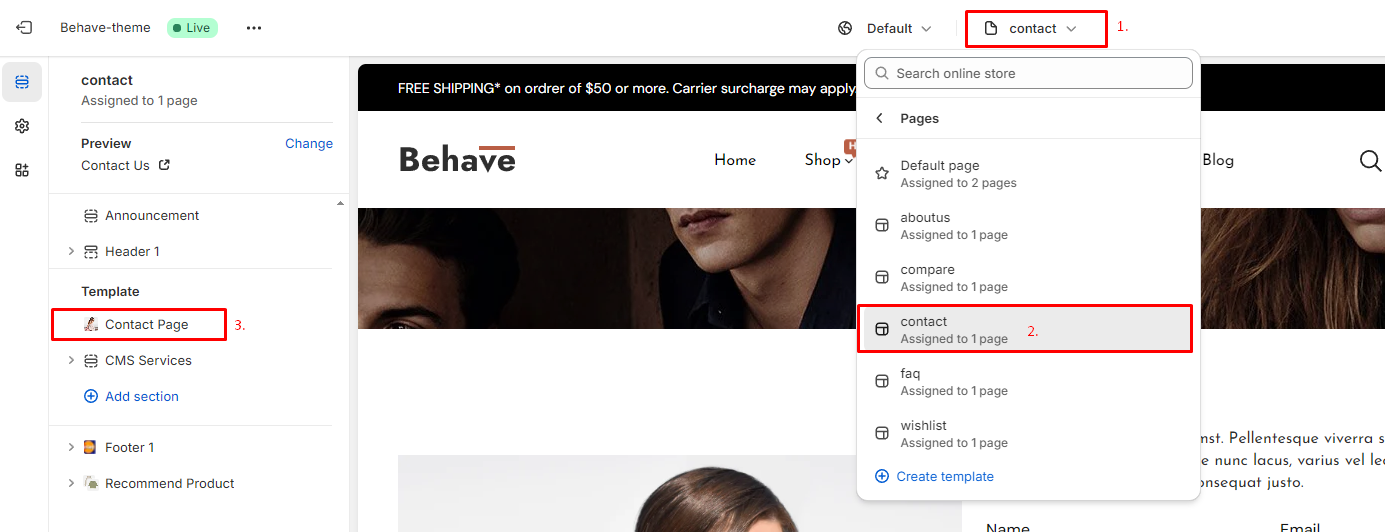
Step 01: Go to Online Store -> Pages -> Add page
Step 02: Set Title & Template suffix as contact
Step 02: OR, To add additional contact page details.
Go to Online Store -> Customize -> Contact Page from top Navigation -> Section -> Contact Page
Create About us page↑ Back to Page
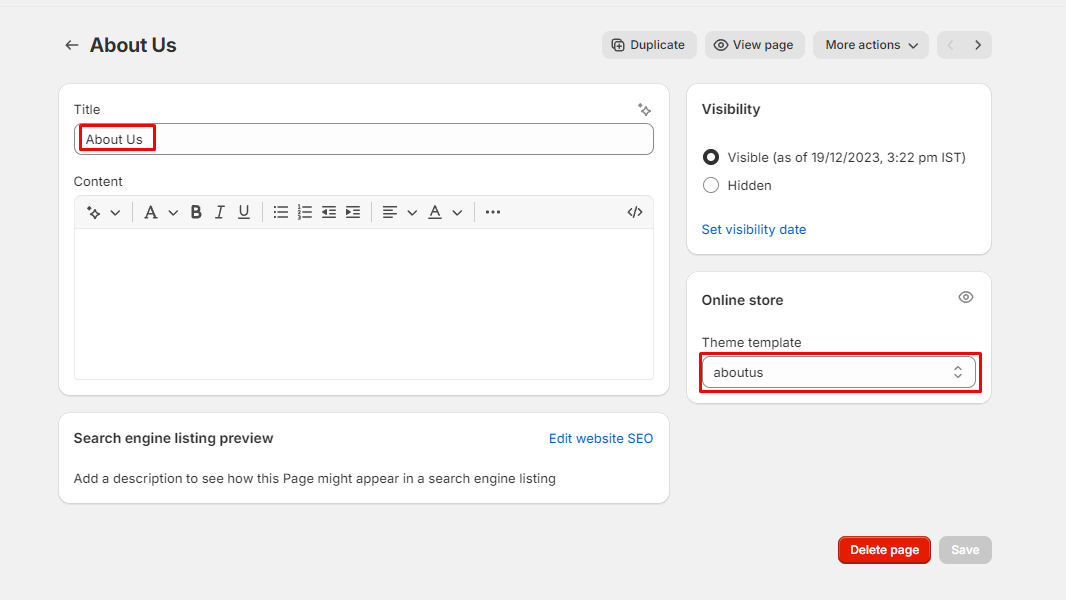
Step 01: Go to Online Store -> Pages -> Add page
Step 02: Set Title & Template suffix as aboutus
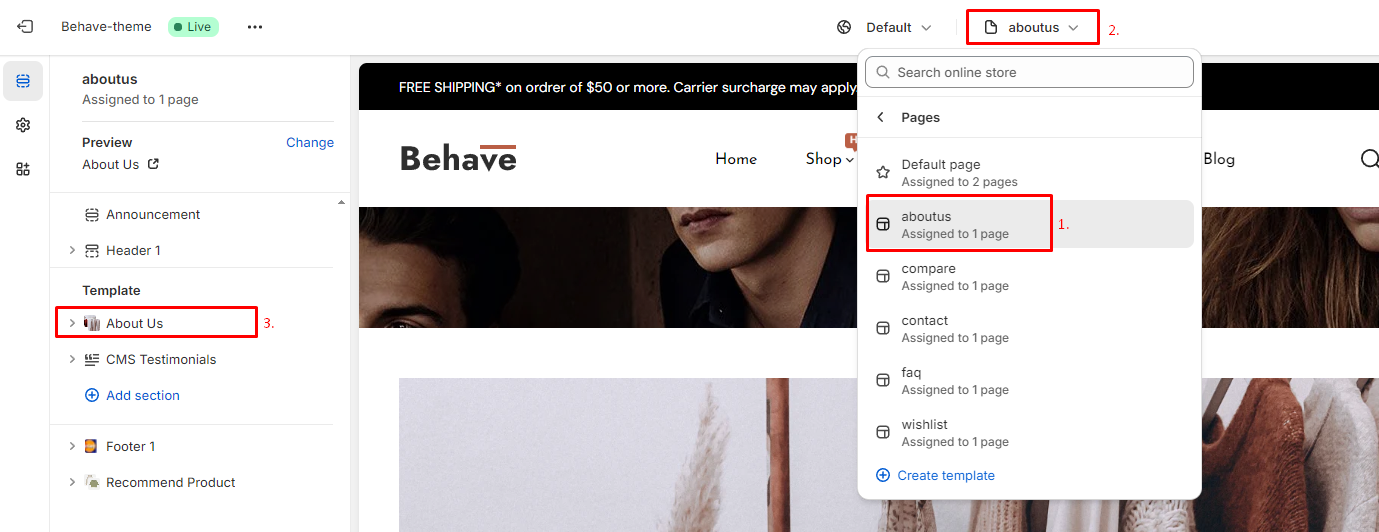
Step 03: OR, To add additional content on the about page.
Go to Online Store -> Customize -> Select About Page from top Navigation -> Section -> About PageCreate Faq's page↑ Back to Page
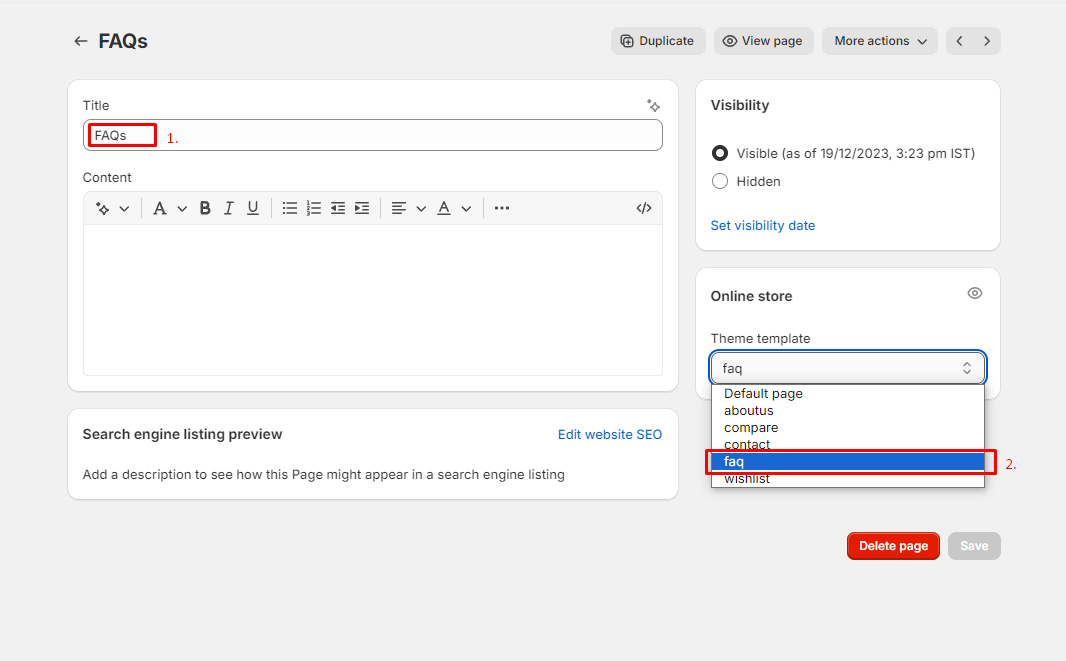
Step 01: Go to Online Store -> Pages -> Add page
Step 02: Set Title & Template suffix as faq
Step 03: OR, To add additional content on faq's page.
Go to Online Store -> Customize -> Select Faq Page from top Navigation -> Section -> Faq's PageCreate Wishlist page↑ Back to Page
Step 01: Go to Online Store -> Pages -> Add page
Step 02: Set Title & Template suffix as wishlist
Create Compare page↑ Back to Page
Step 01: Go to Online Store -> Pages -> Add page
Step 02: Set Title & Template suffix as compare
Create Other pages↑ Back to Page
Step 01: Go to Online Store -> Pages -> Add page
Step 02: Set Title & Template suffix as Default page
Theme Customize↑ Back to Top
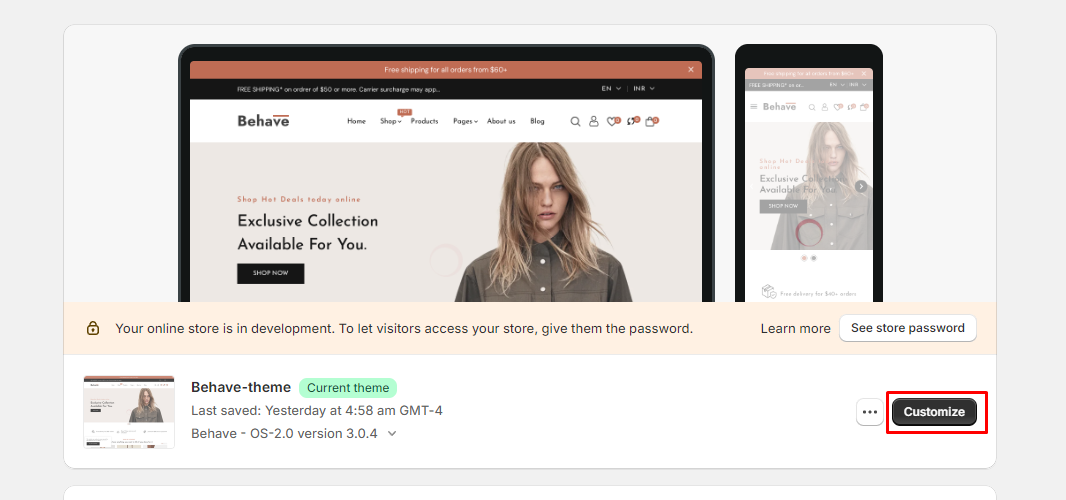
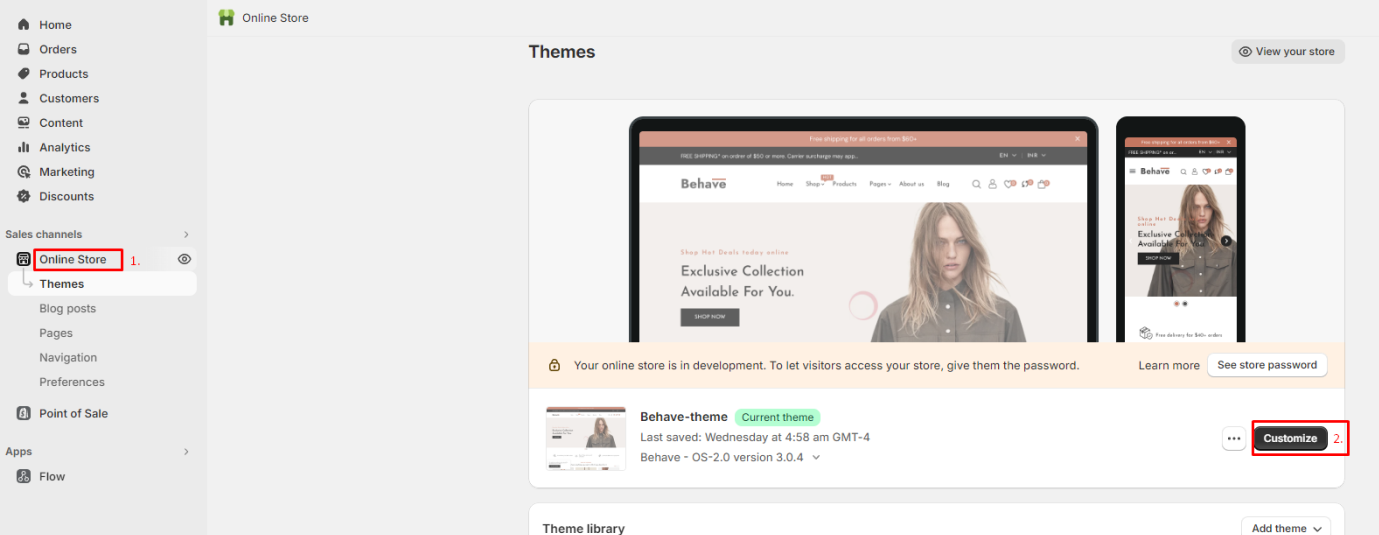
Step 01: Go to Admin -> Online Store -> Themes -> Customize
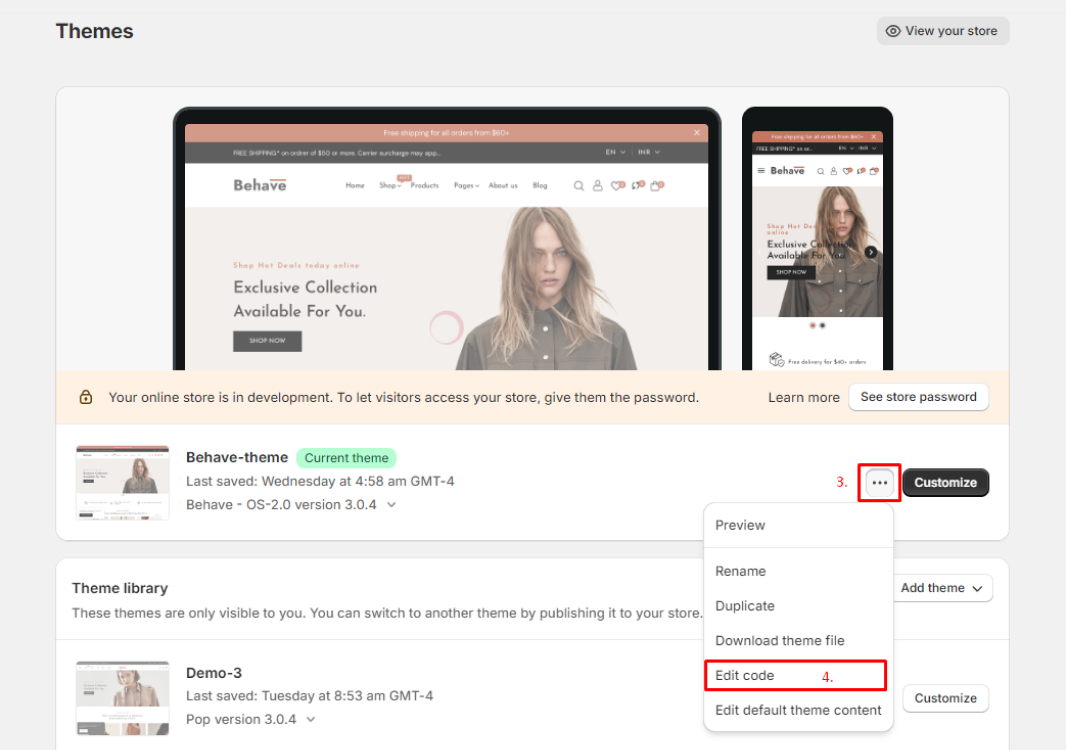
Step 02: If in case of change code files.
Go to : Admin -> Online Store -> Themes -> Edit Code
Theme Settings↑ Back to Top
With the theme, there are too many options available to quickly set up your store.
Theme Color Settings↑ Back to Page
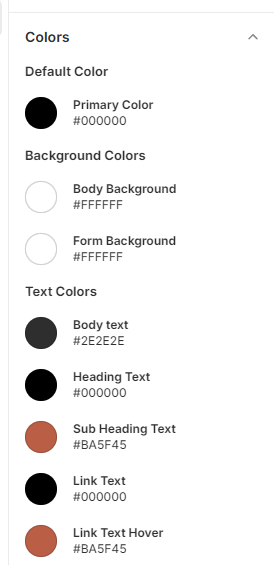
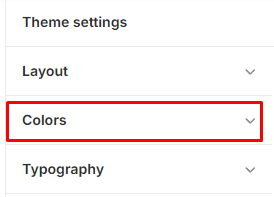
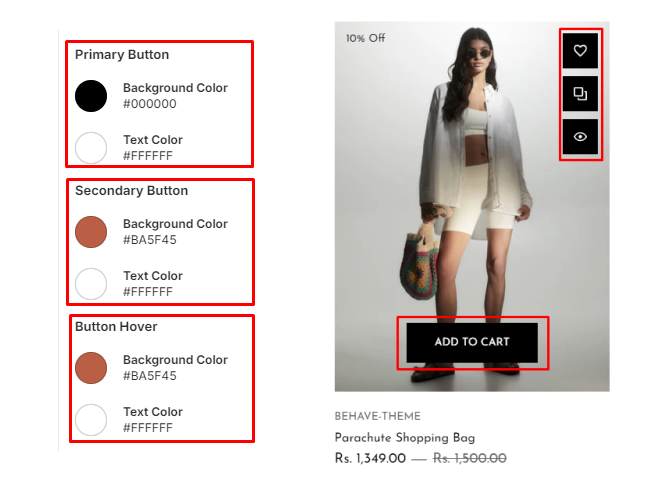
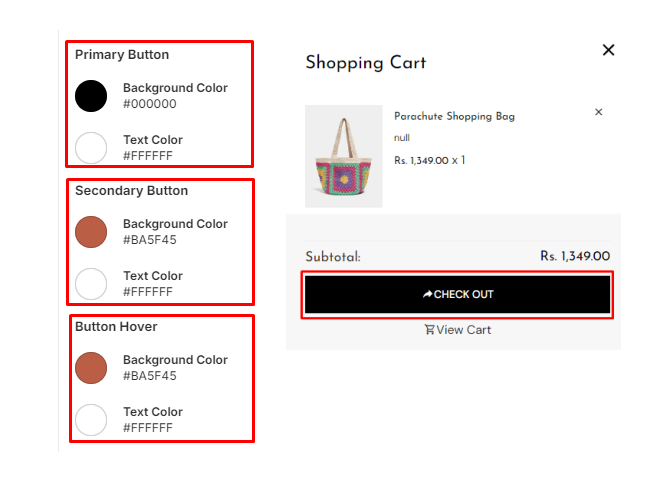
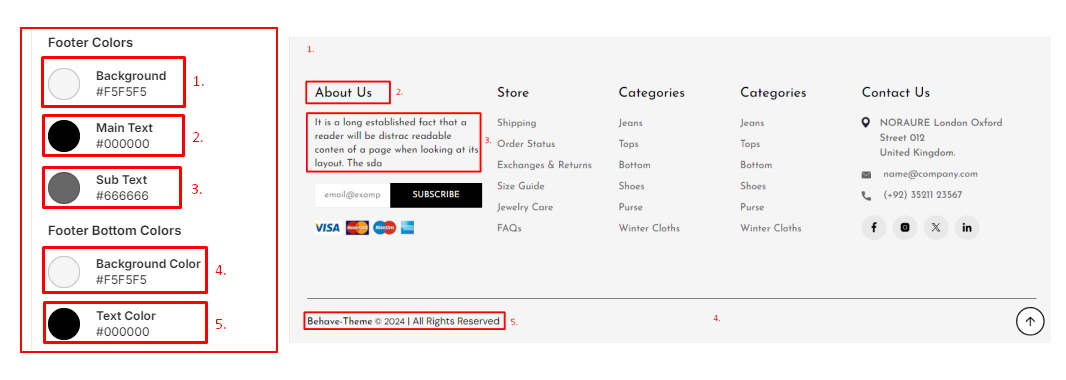
Go to Theme Settings -> Color
To easy to set custom-color to the body, link, title, header, footer, primary button, secondary button, product hover button, etc...
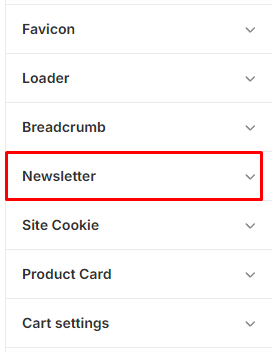
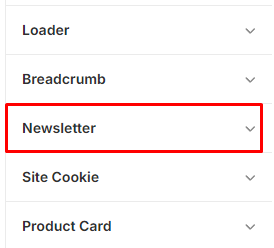
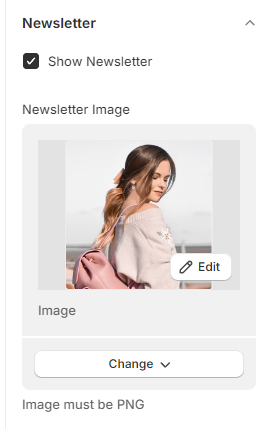
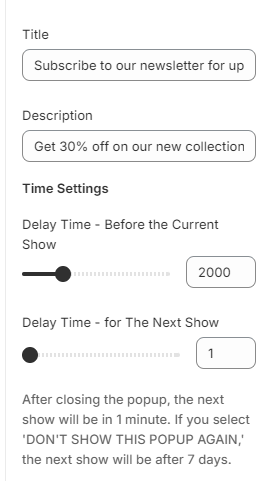
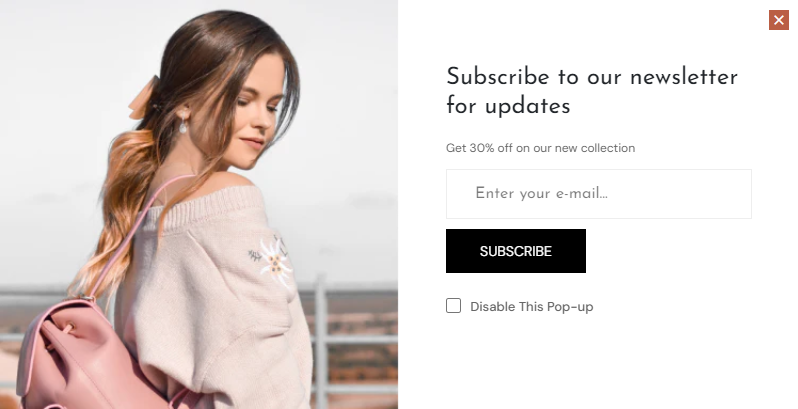
MailChimp Newsletter↑ Back to Page
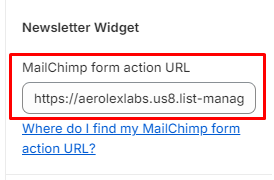
Just have to add MailChimp Form URL.
-
Just have to register the MailChimp account & get an action URL for the newsletter form.
-
Read the official source at How to get a newsletter action URL
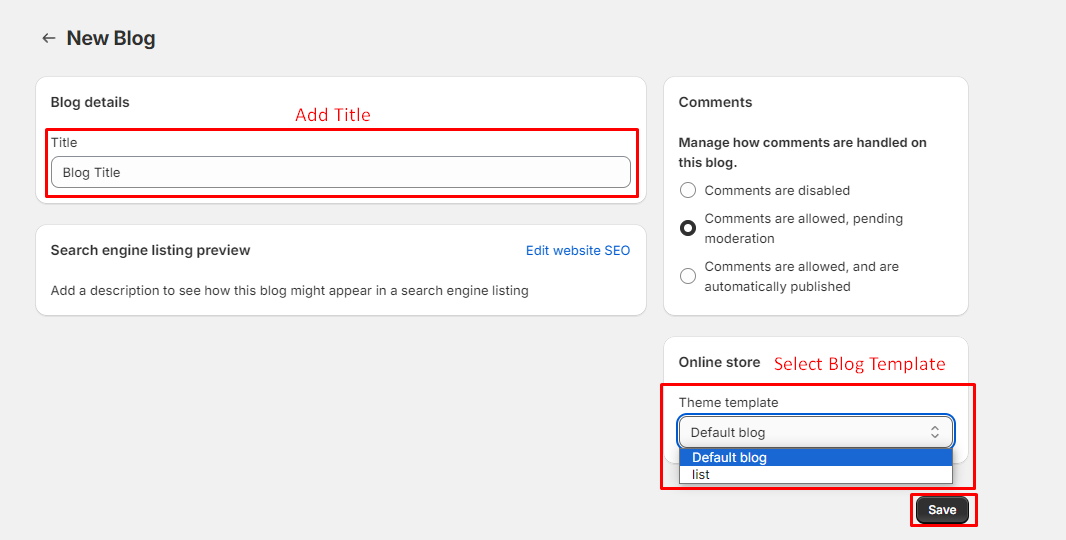
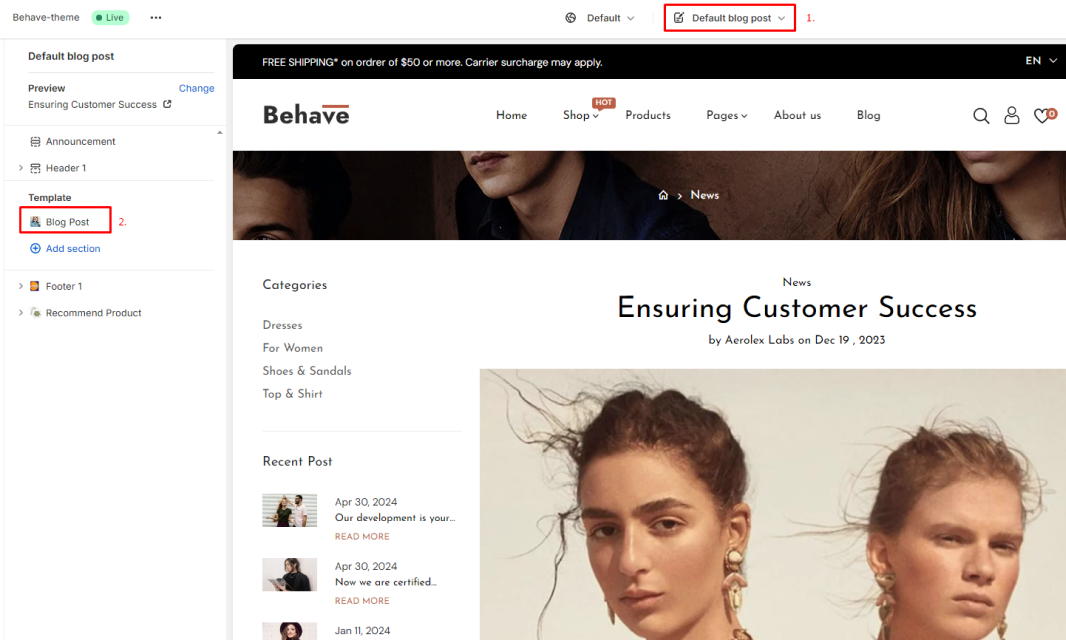
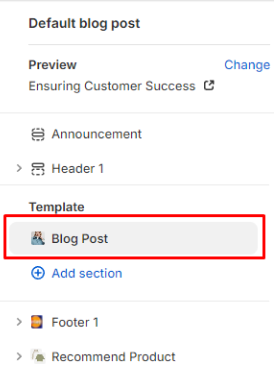
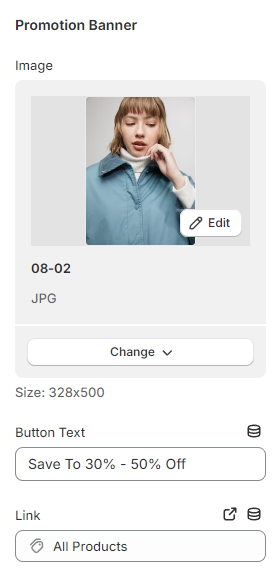
Blog Post↑ Back to Top
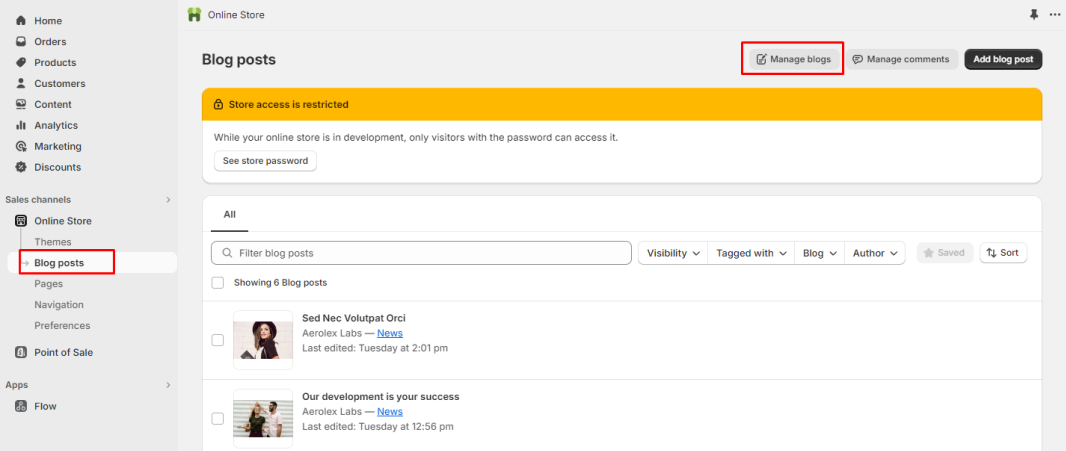
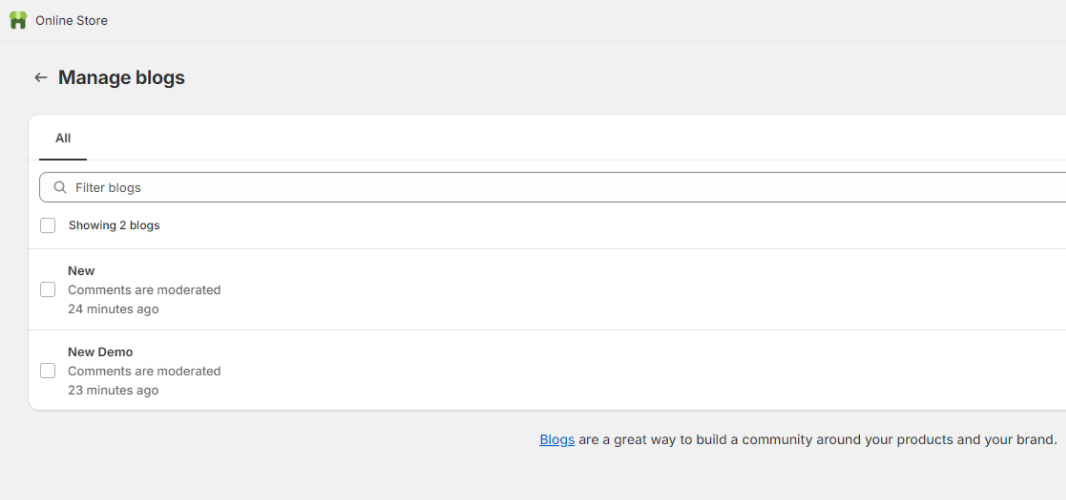
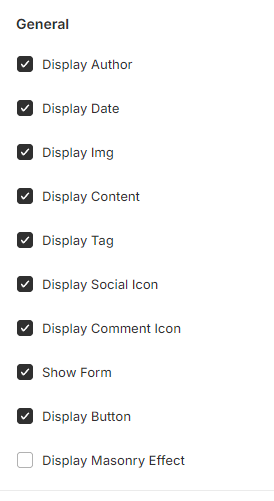
Video Tutorial, To easy to Manage Blog & Posts
Product Metafields↑ Back to Top
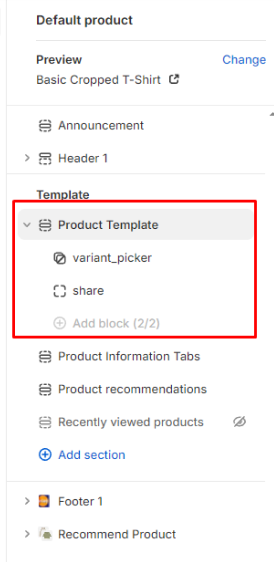
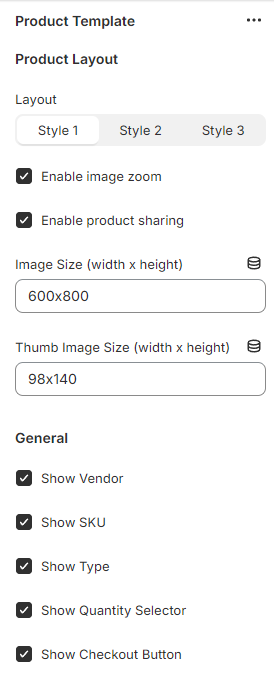
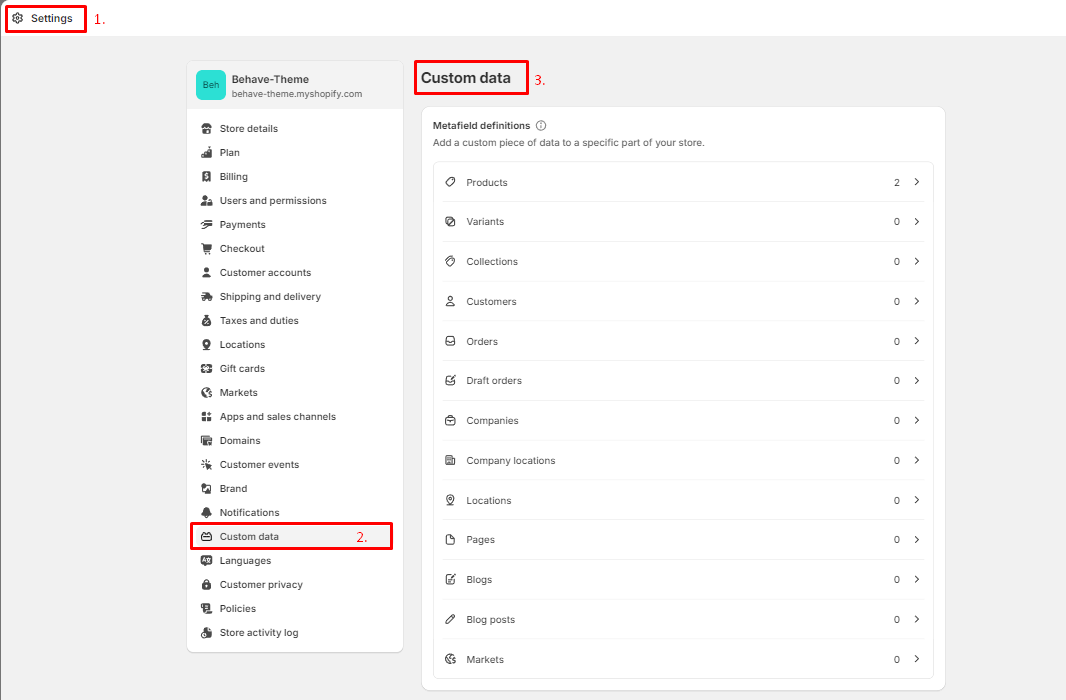
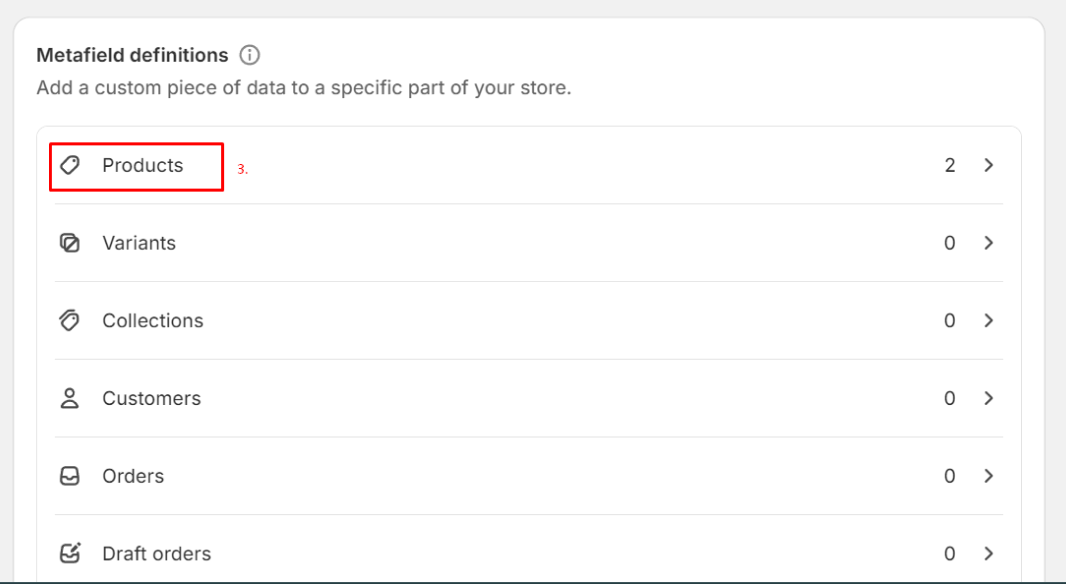
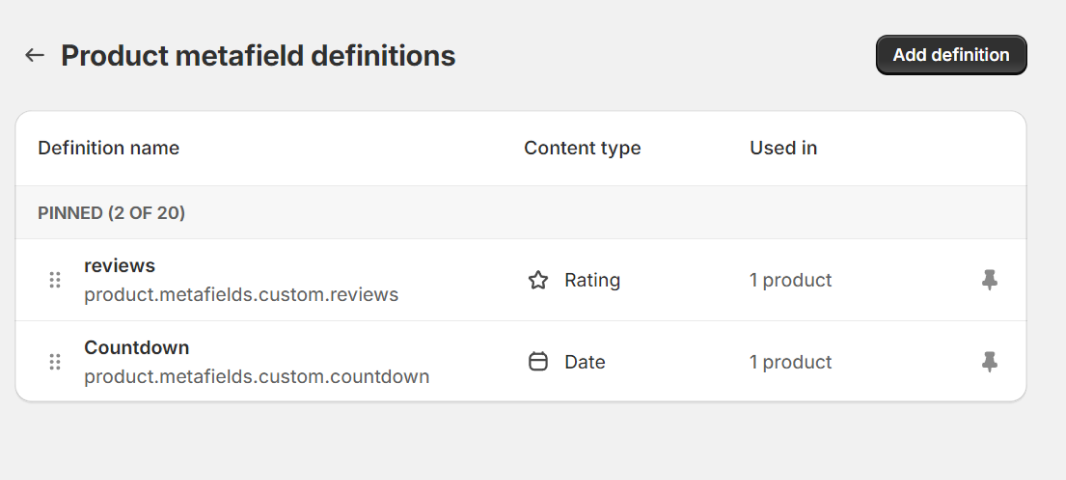
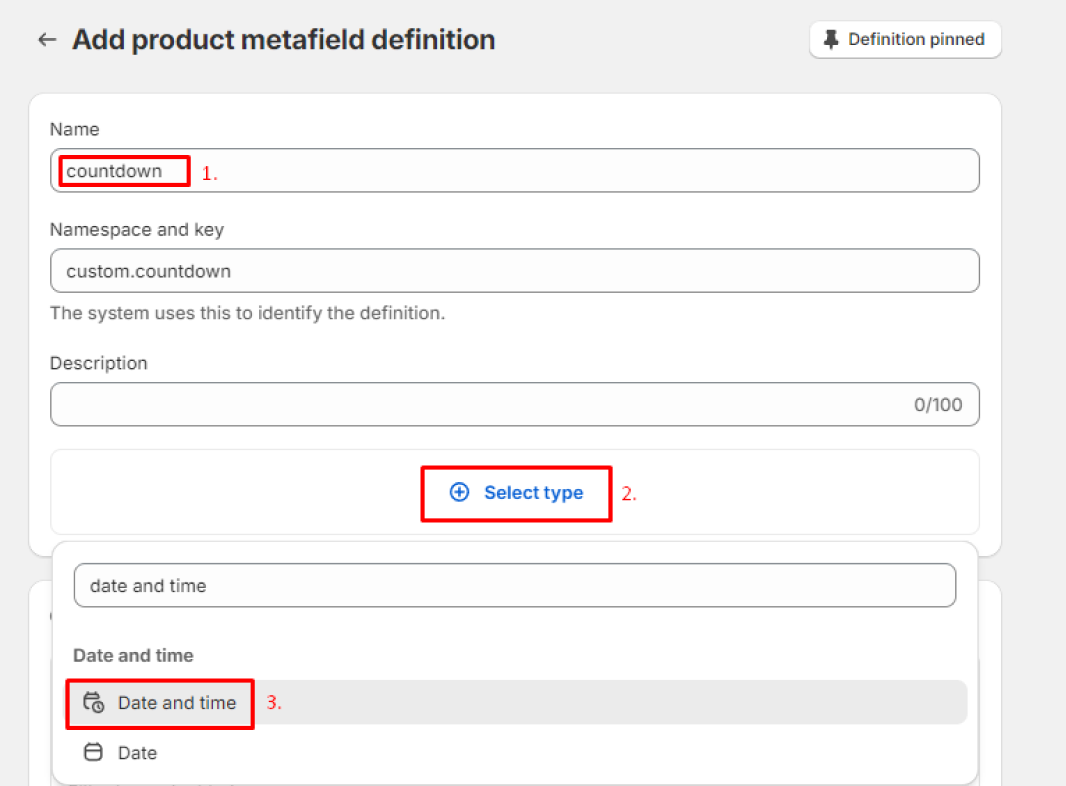
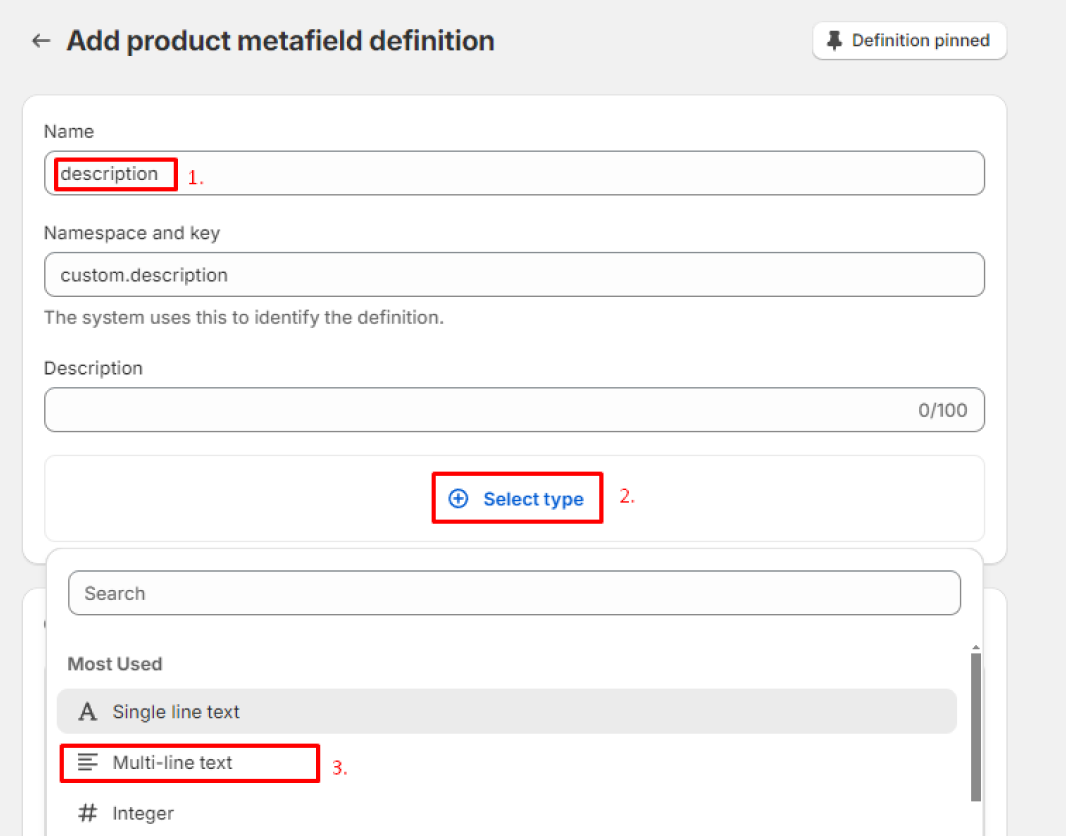
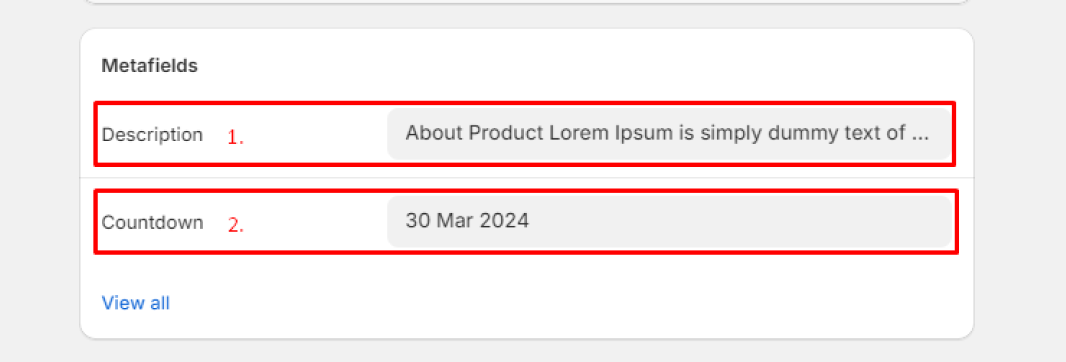
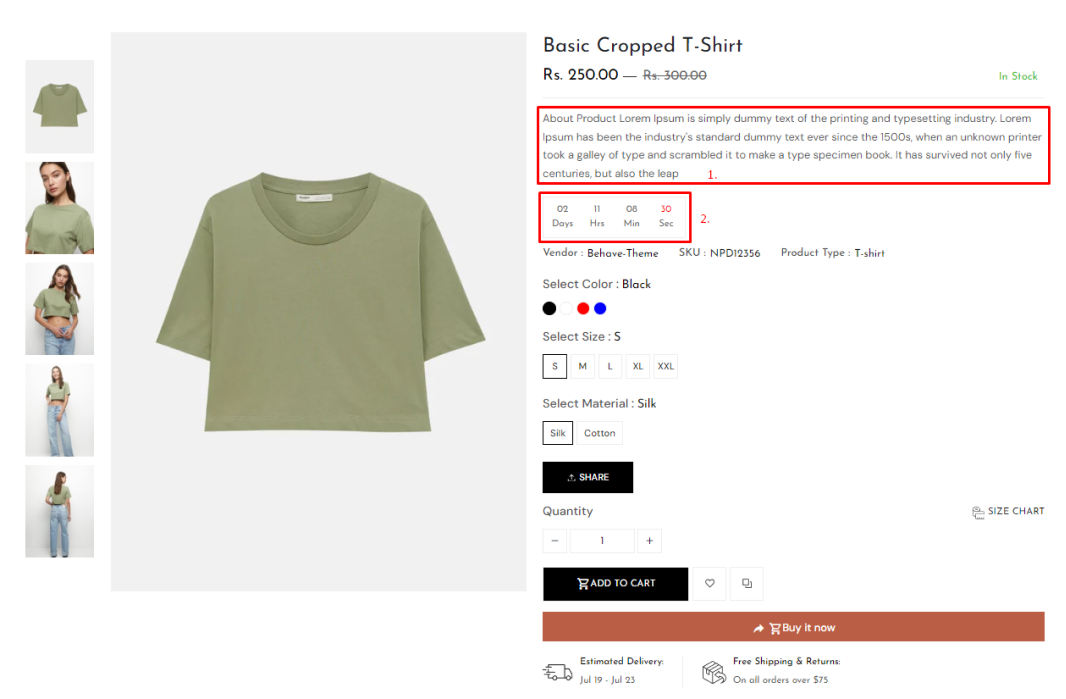
"Metafields" is adding Products custom fields like product countdown, product description.
Homepage Section Setting ↑ Back to Top
-
How to create a home page section.
To Create a Home page section
To add a Section, Create a new one.Homepages Sections & Customization↑ Back to Top
Theme Layouts Common CMS Sections ↑ Back to Top
-
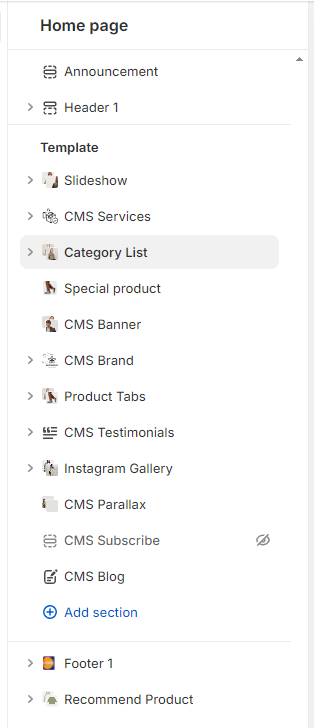
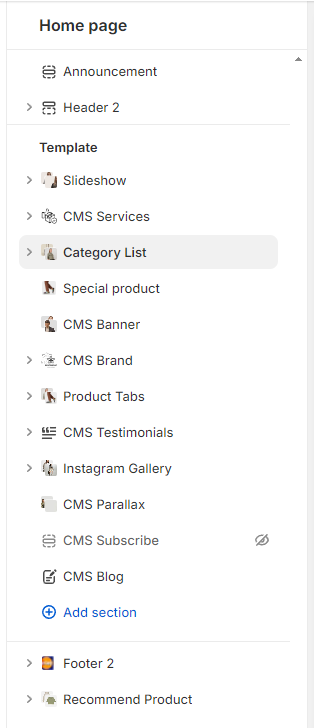
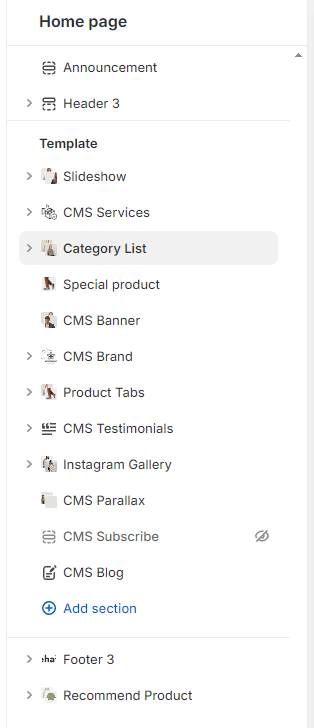
With the theme, There are many sections for the homepage builder. You can discover a list of sections in the customized control panel
List of Banner Styles
Home Slider↑ Back to Page
Go to Section -> Slideshow
-
In this section, you can add slider-image, Title, Sub-title, Description, Button, and also set a text-position, text-effect-style, text-color, button-color.
-
You can get images from, Theme-package -> Demo_images -> Demo-01 -> Slider-01, Slider-02
CMS Services↑ Back to Page
Go to Section -> CMS Services
-
In this section add a service icon, title and subtitle.
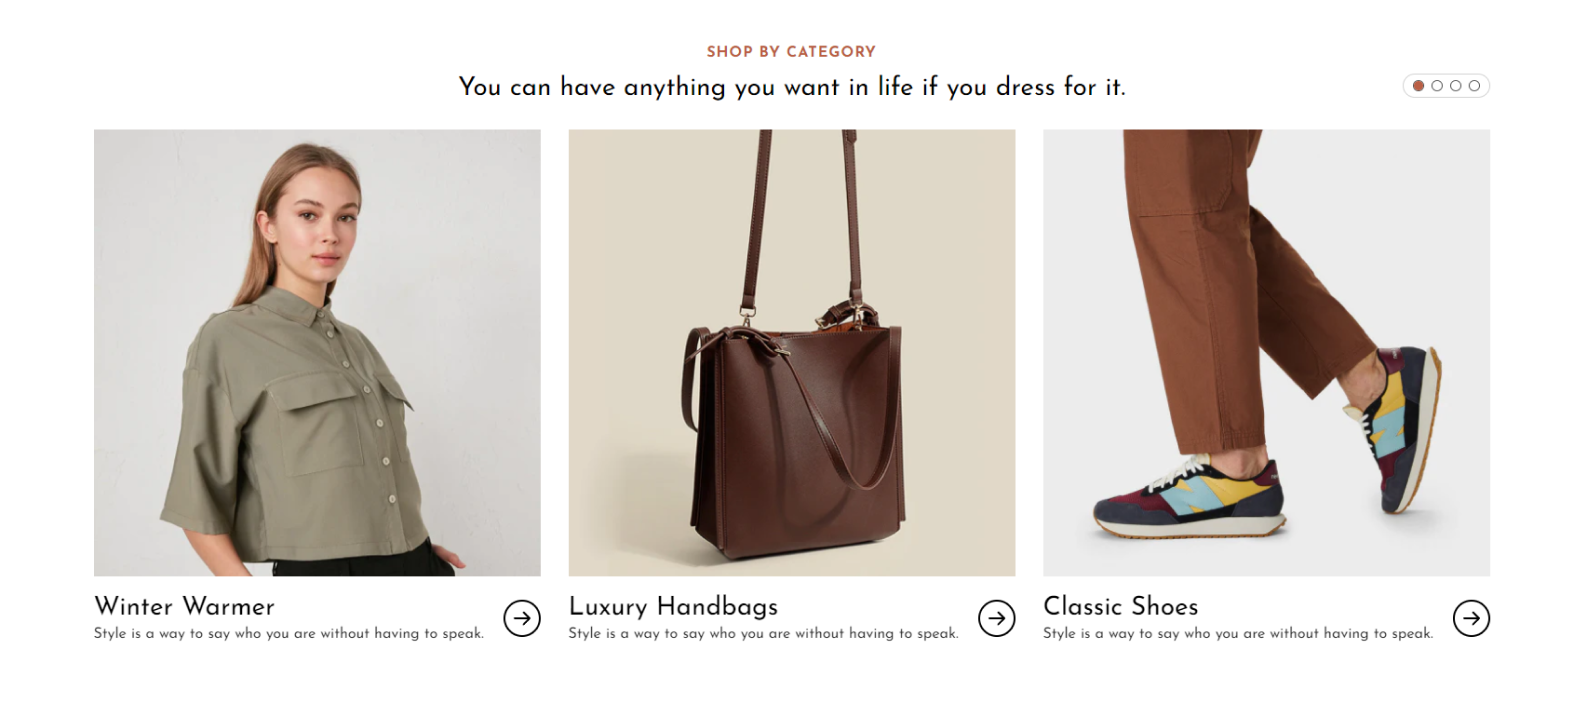
Category Feature↑ Back to Page
Go to Section -> Category Feature.
-
In this section, you can add Images, Content like Title, Items, Subtitles, and also set the text color.
-
You can get images from, Theme-package -> Demo_images -> Demo-01 -> Category-Feature -> Category-1, Category-2, Category-3, Category-4
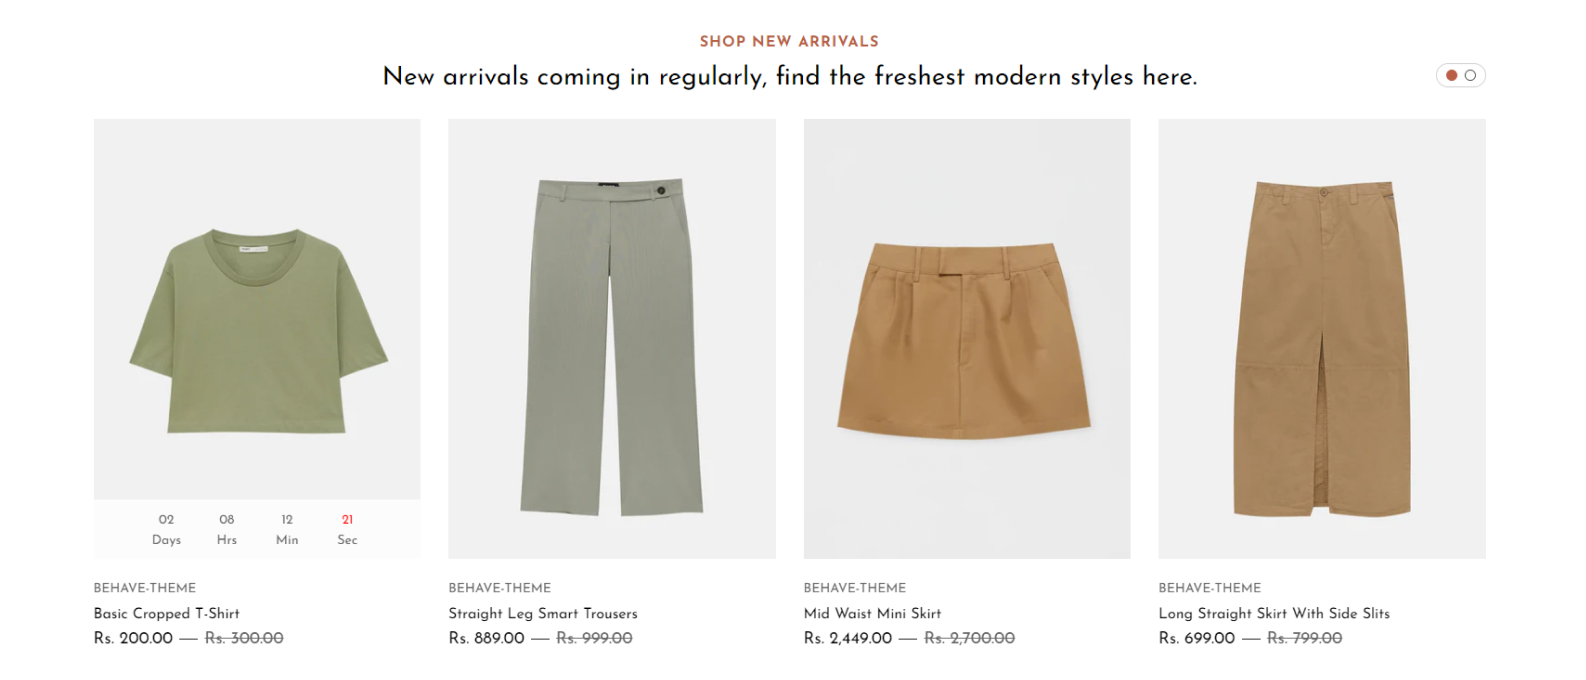
Special Product ↑ Back to Page
Go to Section -> Special Product
-
In this section, you can add product-section and select product-columns. Also, select the collection and add its title.
CMS Banner↑ Back to Page
Go to Section ->CMS Banner
-
In this section, you can add banner Image, Title, Sub-title, Description, Button and also set the text color.
-
You can get images from, Theme-package -> Demo_images -> Demo-01 -> Banner-01, Banner-02
Brand List↑ Back to Page
-
To display top-brand logos with a carousel.
-
You can get images from, Theme-package -> Demo_images -> Demo-01 -> Brand-Logo
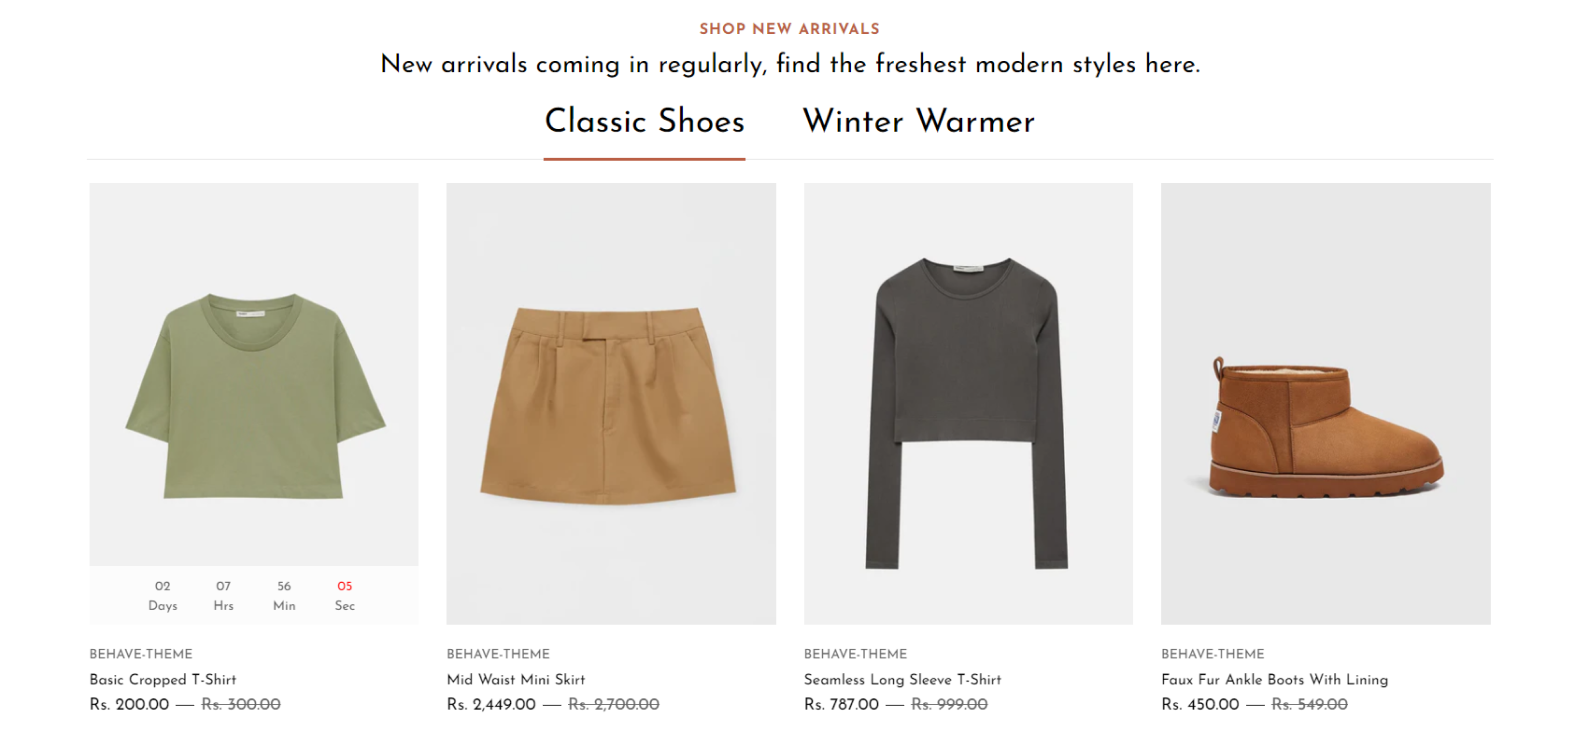
Product Tab ↑ Back to Page
Go to Section -> Product Tabs
-
In this section, you can add product-tabs and select product-columns. Also, select the collection and add its title.
CMS-Testimonial↑ Back to Page
Go to Section ->CMS Testimoials
-
In this section, you can add Images, Title, Subtitle, Description and also set the Background color.
-
You can get images from, Theme-package -> Demo_images -> Demo-01 -> user-1, user-2, user-3
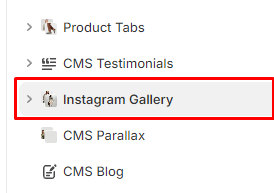
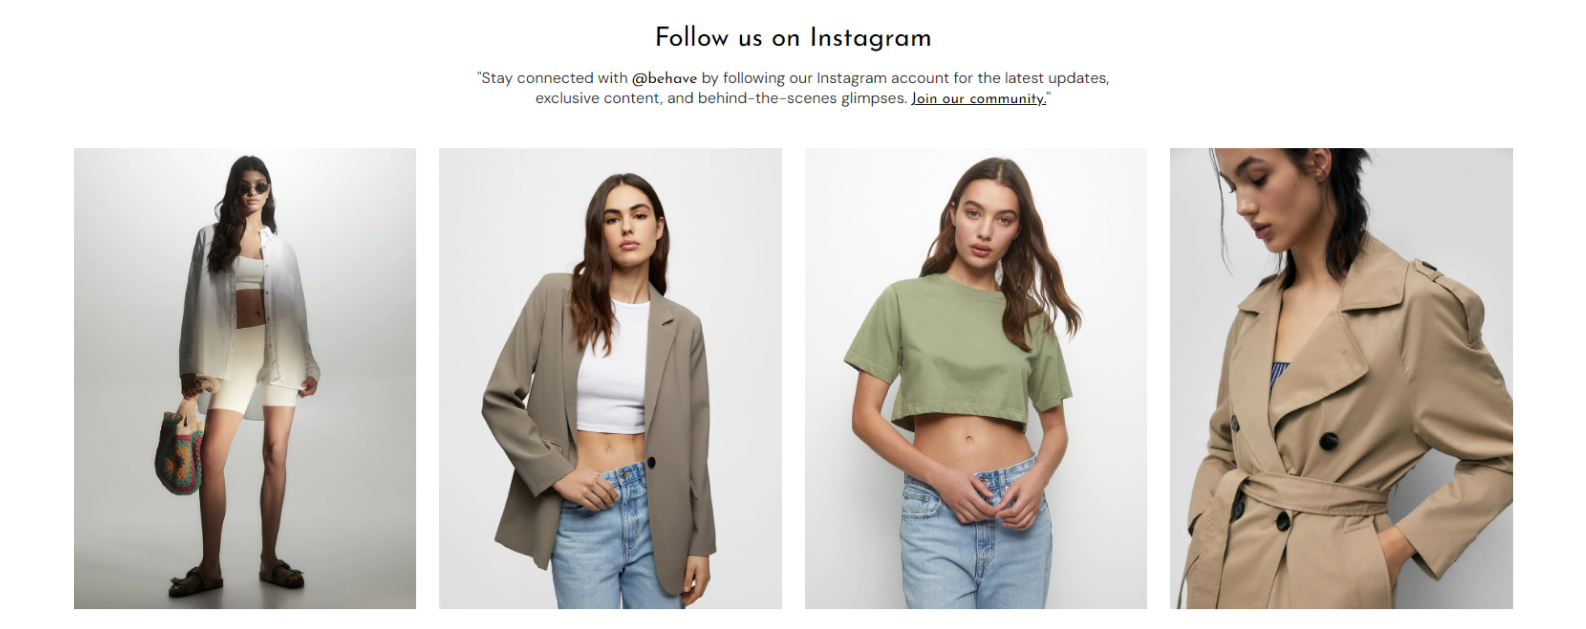
Instagram Gallery↑ Back to Page
Go to Section -> Instagram Gallery
-
You can get images from, Theme-package -> Demo_images -> Demo-01 -> Instagram-Images
-
You can get images from, Theme-package -> Demo_images -> Demo-01 -> Instagram-Images -> user-1, IG-01, IG-02, IG-03, IG-04, IG-05, IG-06, IG-07, IG-08
Parallax↑ Back to Page
Go to Section ->Parallax
-
In this section add title background color, text color, and add parallax content.
-
You can get images from, Theme-package -> Demo_images -> Demo-01
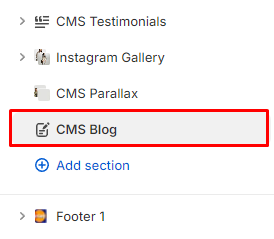
Blog Posts↑ Back to Page
Go to Section -> Blog Posts
-
You can get images from, Theme-package -> Demo_images -> Demo-01 -> Blog-Images
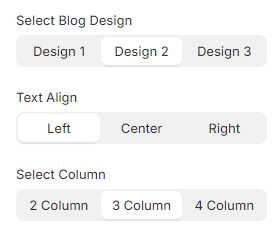
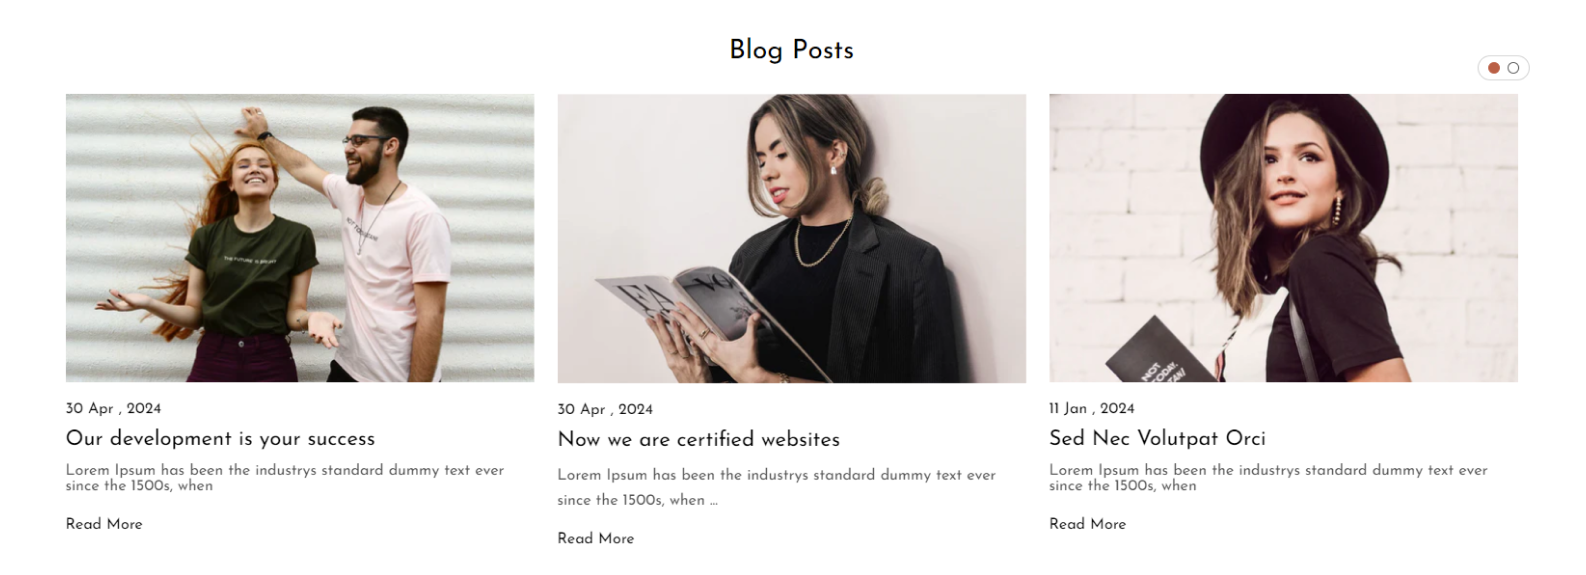
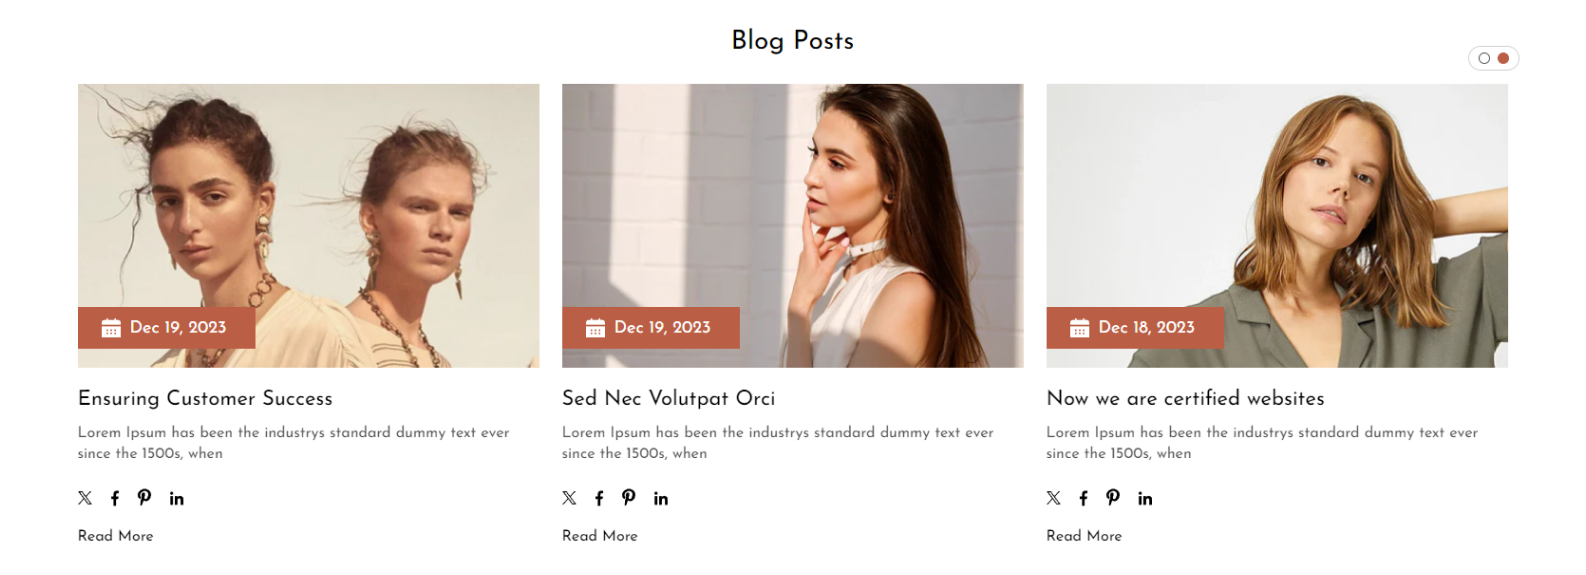
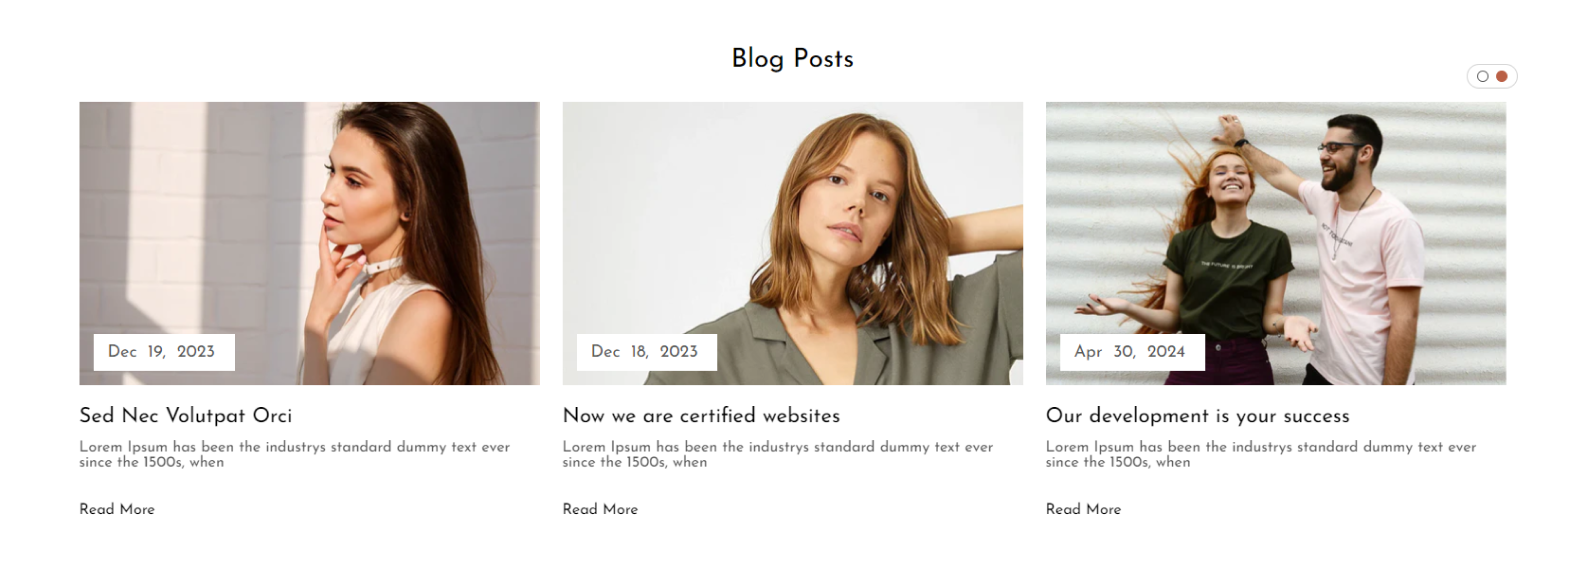
There are 03+ Blog-Carousel styles available to choose from.
Blog Design 01
Blog Design 02
Blog Design 03
Extended Product↑ Back to Top
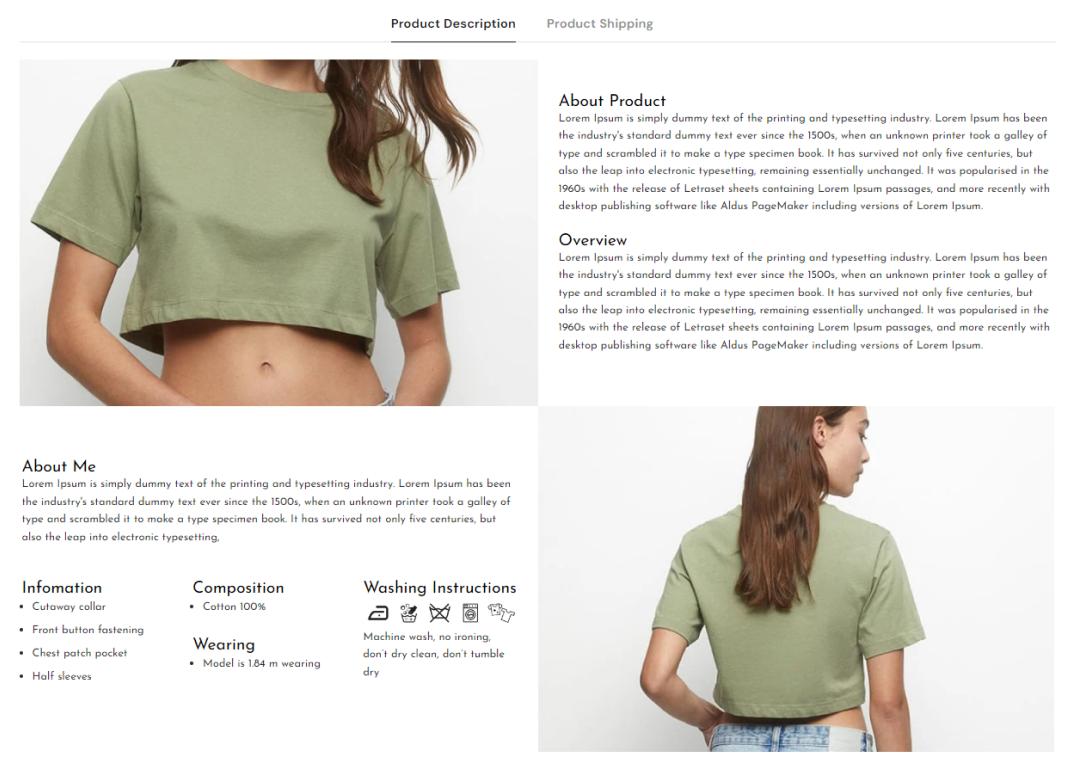
There is a total of 05 Extended Product Design available, you can easy to adapt it for any of your Product Descriptions.
How to Add Extended Product Content↑ Back to Page
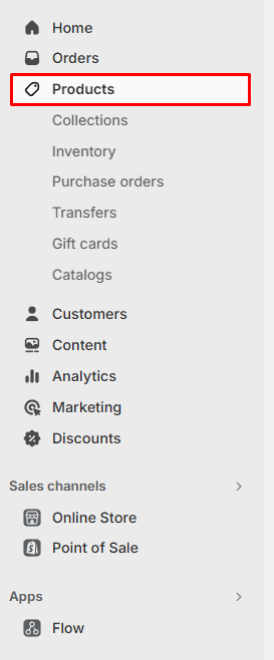
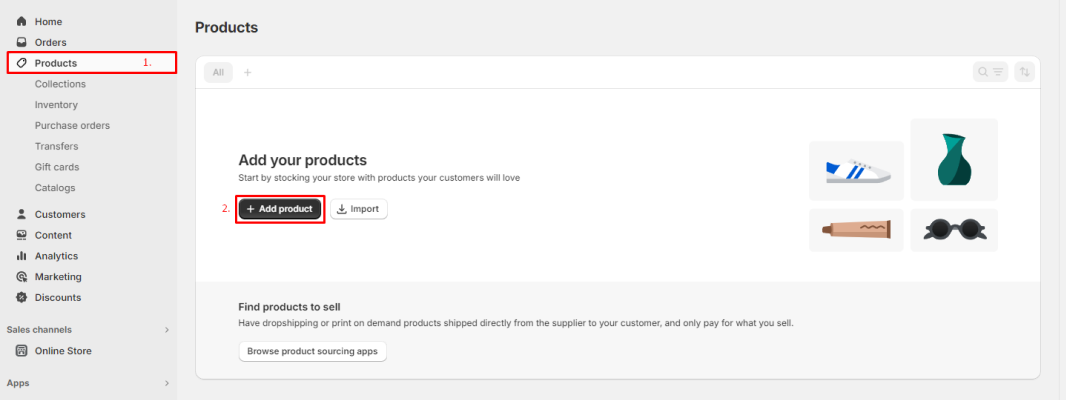
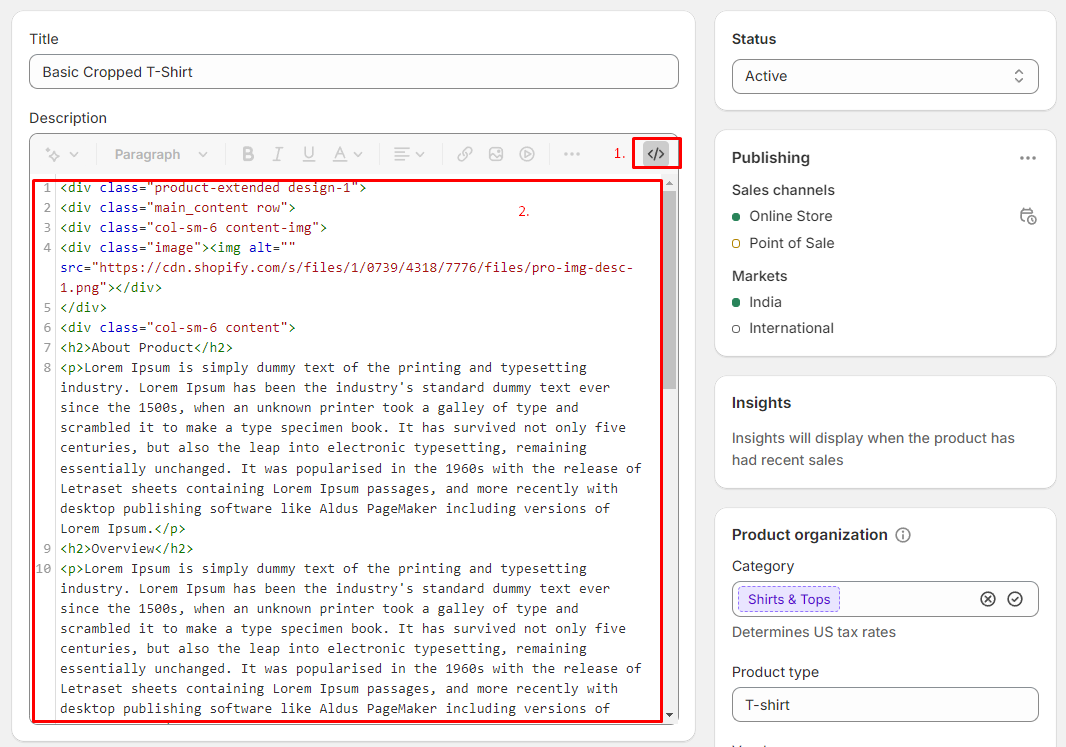
Step 01: Go to Products -> All productsStep 02: Click on "Add products" OR "Edit any Product" Step 03: Just have to set its HTML-code in the Description field.
Extended Design 01↑ Back to Page
//copy product page extended-product design-01 code<div class="product-extended design-1">
<div class="main_content row">
<div class="col-sm-6 content-img">
<div class="image"><img alt="" src="https://cdn.shopify.com/s/files/1/0549/7693/8048/files/pro-img-desc-1.png"></div>
</div>
<div class="col-sm-6 content">
<h2>About Product</h2>
<p>Lorem Ipsum is simply dummy text of the printing and typesetting industry. Lorem Ipsum has been the industry's standard dummy text ever since the 1500s, when an unknown printer took a galley of type and scrambled it to make a type specimen book. It has survived not only five centuries, but also the leap into electronic typesetting, remaining essentially unchanged. It was popularised in the 1960s with the release of Letraset sheets containing Lorem Ipsum passages, and more recently with desktop publishing software like Aldus PageMaker including versions of Lorem Ipsum.</p>
<h2>Overview</h2>
<p>Lorem Ipsum is simply dummy text of the printing and typesetting industry. Lorem Ipsum has been the industry's standard dummy text ever since the 1500s, when an unknown printer took a galley of type and scrambled it to make a type specimen book. It has survived not only five centuries, but also the leap into electronic typesetting, remaining essentially unchanged. It was popularised in the 1960s with the release of Letraset sheets containing Lorem Ipsum passages, and more recently with desktop publishing software like Aldus PageMaker including versions of Lorem Ipsum.</p>
</div>
</div>
<div class="main_content row main_content_rev">
<div class="col-sm-6 content">
<h2>About Me</h2>
<p>Lorem Ipsum is simply dummy text of the printing and typesetting industry. Lorem Ipsum has been the industry's standard dummy text ever since the 1500s, when an unknown printer took a galley of type and scrambled it to make a type specimen book. It has survived not only five centuries, but also the leap into electronic typesetting,</p>
<div class="info-wearing row">
<div class="col-sm-4">
<h2>Infomation</h2>
<ul>
<li><p>Cutaway collar</p></li>
<li><p>Front button fastening</p></li>
<li><p>Chest patch pocket</p></li>
<li><p>Half sleeves</p></li>
</ul>
</div>
<div class="col-sm-4">
<h2>Composition</h2>
<ul>
<li><p>Cotton 100%</p></li>
</ul>
<div class="info-wearing-subul">
<h2>Wearing</h2>
<ul>
<li><p>Model is 1.84 m wearing</p></li>
</ul>
</div>
</div>
<div class="col-sm-4">
<h2>Washing Instructions</h2>
<img src="https://cdn.shopify.com/s/files/1/0549/7693/8048/files/pro-desc-img.png" alt="">
<p>Machine wash, no ironing, don’t dry clean, don’t tumble dry</p>
</div>
</div>
</div>
<div class="col-sm-6 content-img">
<div class="image"><img src="https://cdn.shopify.com/s/files/1/0549/7693/8048/files/pro-img-desc-2.png"></div>
</div>
</div>
</div>
Extended Design 02↑ Back to Page
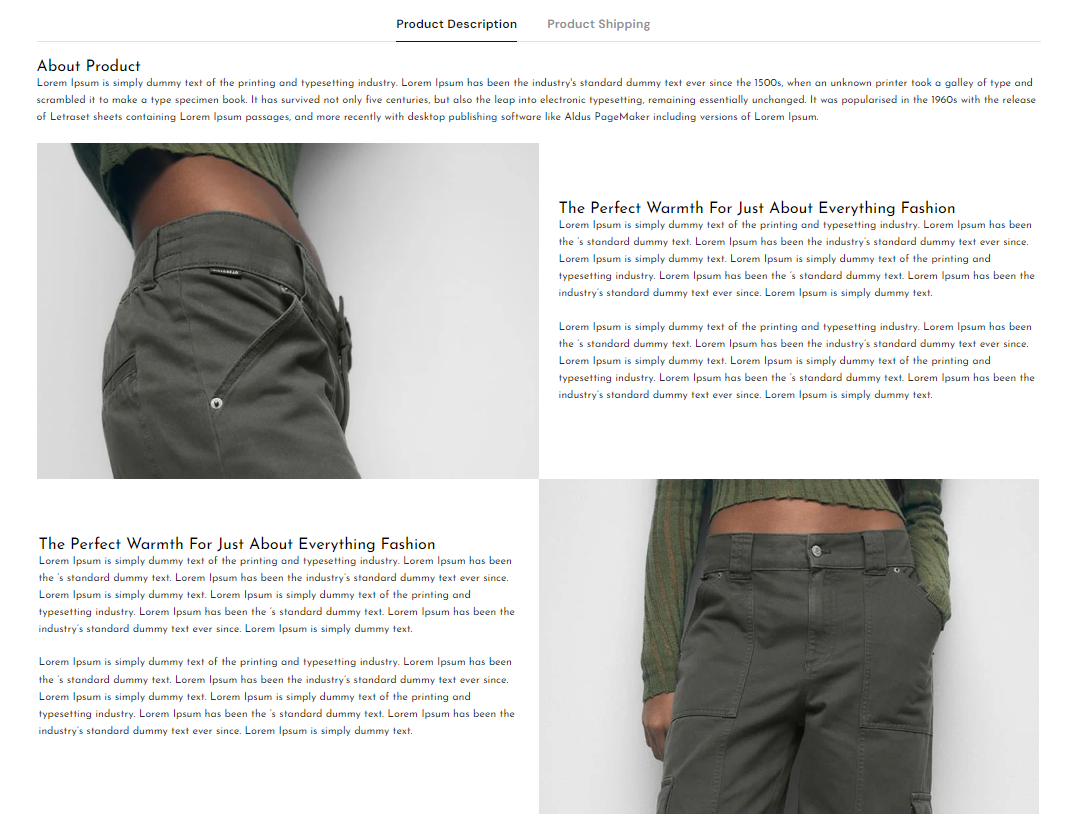
//copy product page extended-product design-02 code<h2>About Product</h2>
<p>Lorem Ipsum is simply dummy text of the printing and typesetting industry. Lorem Ipsum has been the industry's standard dummy text ever since the 1500s, when an unknown printer took a galley of type and scrambled it to make a type specimen book. It has survived not only five centuries, but also the leap into electronic typesetting, remaining essentially unchanged. It was popularised in the 1960s with the release of Letraset sheets containing Lorem Ipsum passages, and more recently with desktop publishing software like Aldus PageMaker including versions of Lorem Ipsum.</p>
<div class="main_content row">
<div class="col-sm-6 content-img">
<div class="image"><img alt="" src="https://cdn.shopify.com/s/files/1/0549/7693/8048/files/pro-img-desc-1.png"></div>
</div>
<div class="col-sm-6 content">
<h2>The Perfect Warmth For Just About Everything Fashion</h2>
<p>Lorem Ipsum is simply dummy text of the printing and typesetting industry. Lorem Ipsum has been the ‘s standard dummy text. Lorem Ipsum has been the industry’s standard dummy text ever since. Lorem Ipsum is simply dummy text. Lorem Ipsum is simply dummy text of the printing and typesetting industry. Lorem Ipsum has been the ‘s standard dummy text. Lorem Ipsum has been the industry’s standard dummy text ever since. Lorem Ipsum is simply dummy text.</p>
<p>Lorem Ipsum is simply dummy text of the printing and typesetting industry. Lorem Ipsum has been the ‘s standard dummy text. Lorem Ipsum has been the industry’s standard dummy text ever since. Lorem Ipsum is simply dummy text. Lorem Ipsum is simply dummy text of the printing and typesetting industry. Lorem Ipsum has been the ‘s standard dummy text. Lorem Ipsum has been the industry’s standard dummy text ever since. Lorem Ipsum is simply dummy text.</p>
</div>
</div>
<div class="main_content row main_content_rev">
<div class="col-sm-6 content">
<h2>The Perfect Warmth For Just About Everything Fashion</h2>
<p>Lorem Ipsum is simply dummy text of the printing and typesetting industry. Lorem Ipsum has been the ‘s standard dummy text. Lorem Ipsum has been the industry’s standard dummy text ever since. Lorem Ipsum is simply dummy text. Lorem Ipsum is simply dummy text of the printing and typesetting industry. Lorem Ipsum has been the ‘s standard dummy text. Lorem Ipsum has been the industry’s standard dummy text ever since. Lorem Ipsum is simply dummy text.</p>
<p>Lorem Ipsum is simply dummy text of the printing and typesetting industry. Lorem Ipsum has been the ‘s standard dummy text. Lorem Ipsum has been the industry’s standard dummy text ever since. Lorem Ipsum is simply dummy text. Lorem Ipsum is simply dummy text of the printing and typesetting industry. Lorem Ipsum has been the ‘s standard dummy text. Lorem Ipsum has been the industry’s standard dummy text ever since. Lorem Ipsum is simply dummy text.</p>
</div>
<div class="col-sm-6 content-img">
<div class="image"><img src="https://cdn.shopify.com/s/files/1/0549/7693/8048/files/pro-img-desc-2.png" alt=""></div>
</div>
</div>
</div>
Extended Design 03↑ Back to Page
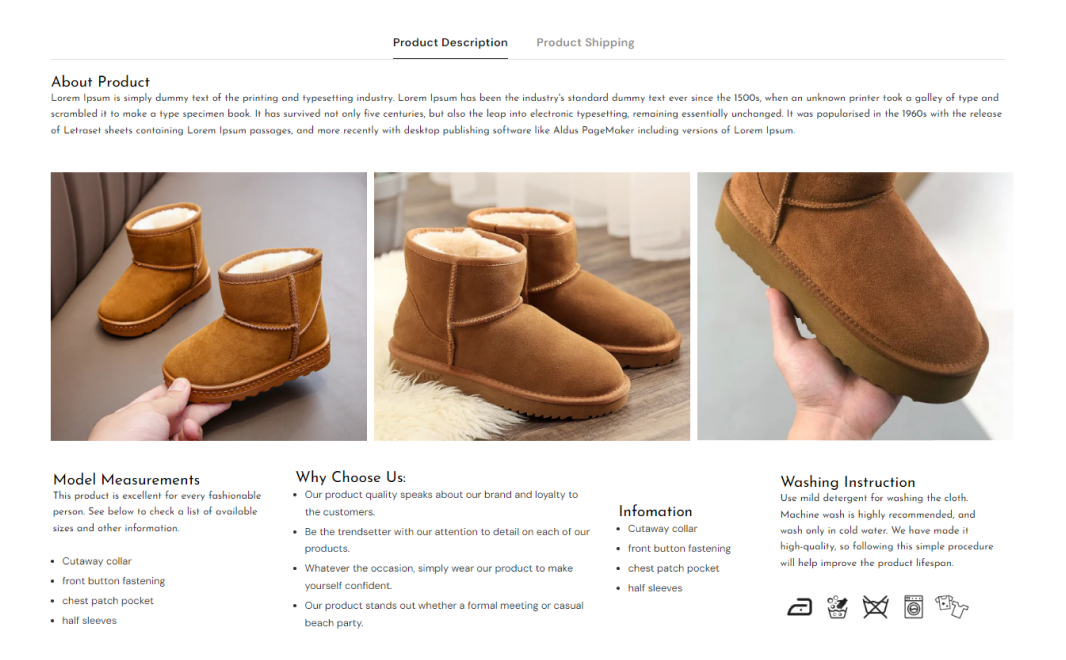
//copy product page extended-product design-03 code<div class="col-sm-12">
<h2>About Product </h2>
<p>Lorem Ipsum is simply dummy text of the printing and typesetting industry. Lorem Ipsum has been the industry's standard dummy text ever since the 1500s, when an unknown printer took a galley of type and scrambled it to make a type specimen book. It has survived not only five centuries, but also the leap into electronic typesetting, remaining essentially unchanged. It was popularised in the 1960s with the release of Letraset sheets containing Lorem Ipsum passages, and more recently with desktop publishing software like Aldus PageMaker including versions of Lorem Ipsum.</p>
</div>
<br>
<div class="main_content row">
<div class="col-sm-4 content-img">
<div class="image"><img alt="" src="https://cdn.shopify.com/s/files/1/0549/7693/8048/files/exten-1.png"></div>
</div>
<div class="col-sm-4 content-img">
<div class="image"><img alt="" src="https://cdn.shopify.com/s/files/1/0549/7693/8048/files/exten-2.png"></div>
</div>
<div class="col-sm-4 content-img">
<div class="image"><img alt="" src="https://cdn.shopify.com/s/files/1/0549/7693/8048/files/exten-3.png"></div>
</div>
</div>
<br>
<div class="main_content row main_content_rev">
<div class="col-sm-3 content">
<h2>Model Measurements</h2>
<p>This product is excellent for every fashionable person. See below to check a list of available sizes and other information.</p>
<ul>
<li>Cutaway collar</li>
<li>front button fastening</li>
<li>chest patch pocket</li>
<li>half sleeves</li>
</ul>
</div>
<div class="col-sm-4 content">
<h2>Why Choose Us:</h2>
<ul>
<li>Our product quality speaks about our brand and loyalty to the customers.</li>
<li>Be the trendsetter with our attention to detail on each of our products.</li>
<li>Whatever the occasion, simply wear our product to make yourself confident.</li>
<li>Our product stands out whether a formal meeting or casual beach party.</li>
</ul>
</div>
<div class="col-sm-2 content">
<h2>Infomation</h2>
<ul>
<li>Cutaway collar</li>
<li>front button fastening</li>
<li>chest patch pocket</li>
<li>half sleeves</li>
</ul>
</div>
<div class="col-sm-3 content">
<h2>Washing Instruction</h2>
<p>Use mild detergent for washing the cloth. Machine wash is highly recommended, and wash only in cold water. We have made it high-quality, so following this simple procedure will help improve the product lifespan.</p>
<div class="image"><img alt="" src="https://cdn.shopify.com/s/files/1/0549/7693/8048/files/pro-desc-img.png"></div>
</div>
</div>
</div>
Support System ↑ Back to Top
Theme: Behave - Shopify Multi-Purpose Responsive Theme
Thank You for purchasing Aerolexlabs Theme.
If you have any questions or need help, please do not hesitate to contact us at, mangozy.freshdesk.com.
Thanks again for your purchase.
To get faster and non-stop support, Please mention your theme purchased-code, and create one support account for us too,
Here you can get theme purchased-code: https://www.aerolexlabs.com//envato/themeforest-purchase-code.gif
And to allow us as support-account: Manage Staff Account
OR, Create a Staff Account ↑ Back to Top
Give staff permissions to your store
-
As the store owner, you can send invitations to allow us with all of the required permissions to access your store like theme, and configuration sections.
-
Email Id you've to invite us: aerolexlab@gmail.com
Video Tutorial, To easy to Create a staff Account for us
Here are quick steps to follow
Step 01: Log in to your store admin.
Step 02: Click Settings -> Users and permissions.
Step 03: Click Add staff. In the Store permissions
Step 04: Enter a first name, the last name, and an email address: aerolexlab@gmail.com for the new staff member.
Note: Please allow required permissions like your Themes, Products, Apps, Settings, Blog Posts, Navigation, Pages for your store access, So we can resolve your queries quickly and save your precious time.

